Lessons from the field – 3D Printed Respirators
 Wearing Personal Protective Equipment to prevent infection has become the new normal during the COVID-19 crisis. Face masks and respirators are in high demand as health care workers fight to protect themselves on the front lines. We’ve worked with hundreds of organizations around the globe that are creating 3D printed respirators that can provide respiratory protection when normal supplies run out. This post will cover the lessons we’ve learned from collaborating with these organizations, and the best tips to print your own respirator on your 3D printer.
In our last post, we covered the differences between face masks and respirators. Make sure to read that story first to understand the terminology. For this post, we are going to focus on respirator-style designs. Respirators are typically hard-shell devices with an industry-rated filtration medium that removes harmful particles from the air. The combination of the filter and the seal it creates to the face allows respirators to provide highly effective respiratory protection.
Keep in mind that while 3D printed respirators may look very similar to their commercial counterparts, they are not a replacement for certified respirators (N95, KN95, FFP2, etc). Certified devices go through extensive regulatory testing, so use these items whenever possible.
Select an Approved Design
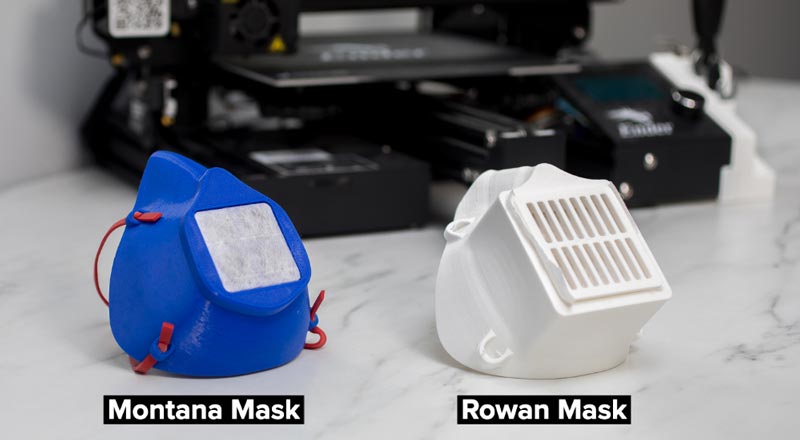
Of the many 3D respirator-style designs available online, we recommend two designs that feature easy to print components and use readily available materials. The first design is the Montana Mask, available from makethemasks.com. The second is the Rowan Mask, available from Rowan University. Both respirator-style designs include a comfortable shell that’s designed to conform to your face and accept a wide range of filter mediums.
Source your Materials
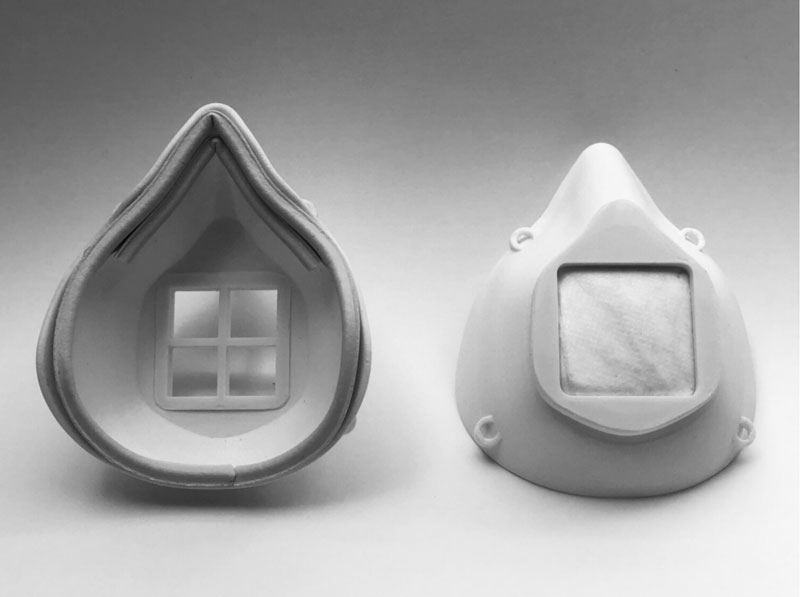
Respirator-style masks typically have four parts, the respirator shell, filter frame, filter material, and strapping. Some respirators have provisions in their design for a flexible gasket that provides additional comfort and a better seal to the face.
The shell is the largest part of the respirator assembly, and it can be a relatively large print with complex surface geometry. Printing in PLA provides good print quality and allows the shell to be warmed using hot water to easily conform to your face. The filter frame should be printed using the same filament as your shell to ensure dimensional consistency between the two parts.
The filter material can be as simple as cotton fabric, like material from a t-shirt or a pillowcase, or something with a higher degree of filtration, like a furnace filter. In the 3D printing community, common filter materials that we have seen are MERV-rated HVAC filters, HEPA filters, and vacuum bags. For any of these items, make sure to select a product that is not made with fiberglass particles, as those could be dangerous to inhale. Researchers from Cambridge University tested several types of material in this study and found vacuum cleaner bags are almost as effective as surgical masks.
Optimize your Print Settings
In order for you to get the highest print quality, here are some best practices we’ve gathered from organizations that are printing these respirator-style designs.
-
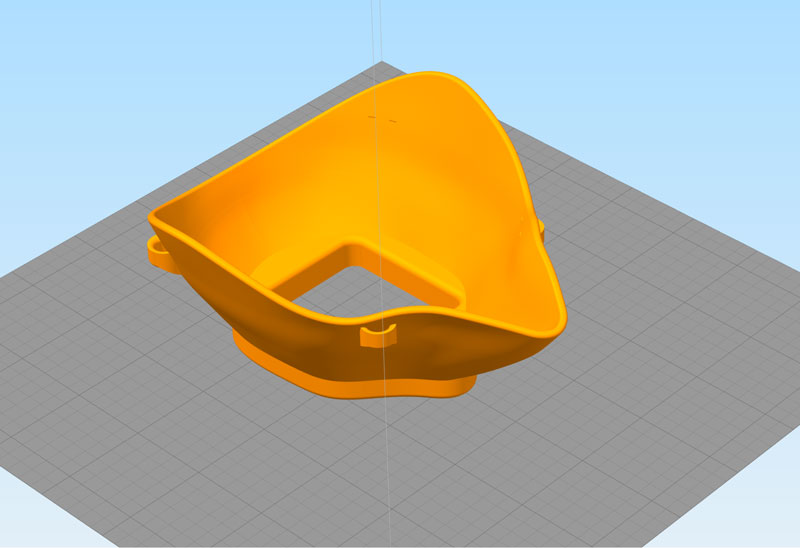
Place the Shell Flat on the Bed
- Most respirator models incorporate a flat section at the front of the shell to accommodate the filter tray. Place this flat section on the print bed so that your print can properly adhere to the bed.
- In Simplify3D, Ctrl+L (or Cmd+L on the Mac) will allow you to click on a face to align it to the print bed. See how this is done in our support video.
- You can also double-click on the part to activate the Model Settings Panel. Here you can rotate and scale the part according to your needs.
-
Minimize Support Structures
- If your printer is well-tuned, the Montana Mask and the Rowan Mask can be printed without supports.
- In our testing, print defects appeared near the strap attachment points and in the lettering on the Rowan Mask. The Montana Mask could potentially use supports around the nose and chin areas as well.
- If supports are necessary on your printer, generate custom support structures to target the trouble areas.
-
Lower the Layer Height
- Lowering the layer height can help improve your print quality in the curved areas of the respirator shell.
- You can check the estimated print time in the preview window to achieve the best quality possible within your time constraints.
- Our team found that a 0.1-0.15mm layer height achieved a good balance of surface finish and print time.
Putting your Print to Use
Your completed print is nearly ready for use, now it’s time to assemble and prepare your respirator.
-
Cut the material for your filter
-
 The Montana Mask requires a 2”x2” square and the Rowan Mask will accept a larger 3”x3” square of fabric.
 - Both designs use a filter tray that keeps the filter material stretched tight across the opening in the front of the shell. Make sure the fabric is large enough to completely cover the filter tray to eliminate gaps that could leak outside air.
-
-
Customize the Fit
- If you printed your respirator in PLA, warm the outer edge of the shell where it meets your face with a hairdryer or by placing it in a hot water bath. Once the plastic has softened, you can form it slightly to better fit your facial features. You may want to wear gloves during this process to avoid burning yourself.
- The Montana Mask can accommodate a gasket made of 1/4 inch weather stripping inside the shell to create a tighter and more comfortable seal to the face.
-
Disinfect
- If you intend to donate the respirator to someone else, make sure you disinfect the completed assembly first. There are many ways to disinfect, one of the most accessible options is bleach. Submerge the shell and filter frame in a 10% bleach solution for 5 minutes to remove any contaminants. The CDC has compiled helpful tips on this page.
During this challenging time continue to check back frequently for updates on how you can help in the fight against COVID-19. The Simplify3D team will continue to provide software support and be available to answer any questions.
Are you helping in the fight against COVID-19 using 3D printing technology? If you have participated in 3D printing efforts to support health care workers or know of new ways additive manufacturing is being used to combat COVID-19, please share your story with us at stories@simplify3d.com.