3D Printing the Perfect Sprinkler
 Dreaming up new design ideas is all in a day’s work for our engineers! We thought it would be exciting to challenge them to create a 3D printable sprinkler from scratch. As you probably know, there is often some trial and error involved in the 3D printing process, but that’s all part of the fun.
After some experimenting, iterating, and splashing around, we wanted to share what we learned as we created a watertight, two-part sprinkler. You will also find step-by-instructions to make your very own sprinkler!
The Design Process
A sprinkler may look simple, but there was quite a bit of planning and testing to perfect the internal water channels, threads, and moving parts. Our engineers tried a variety of prints before building a sprinkler that checked all the boxes. Here are a few things we learned along the way:
Our First Attempt
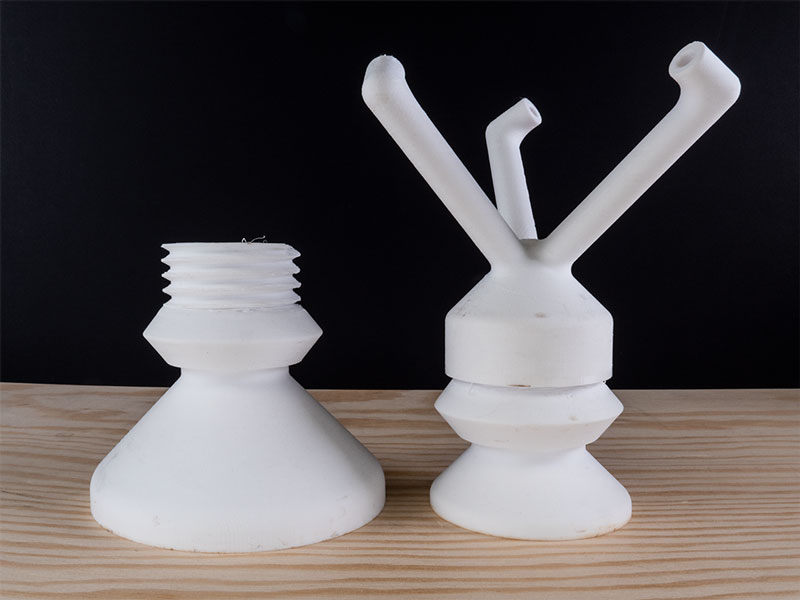 Our initial vision was to create a sprinkler that would spin, so we came up with the part you see in the photo with three rotating arms. Instead of spinning, the sprinkler just sprayed three static jets of water with no rotation. Time to take a different approach.
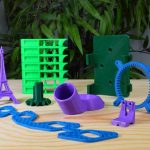
Perfecting the Sprinkler Head
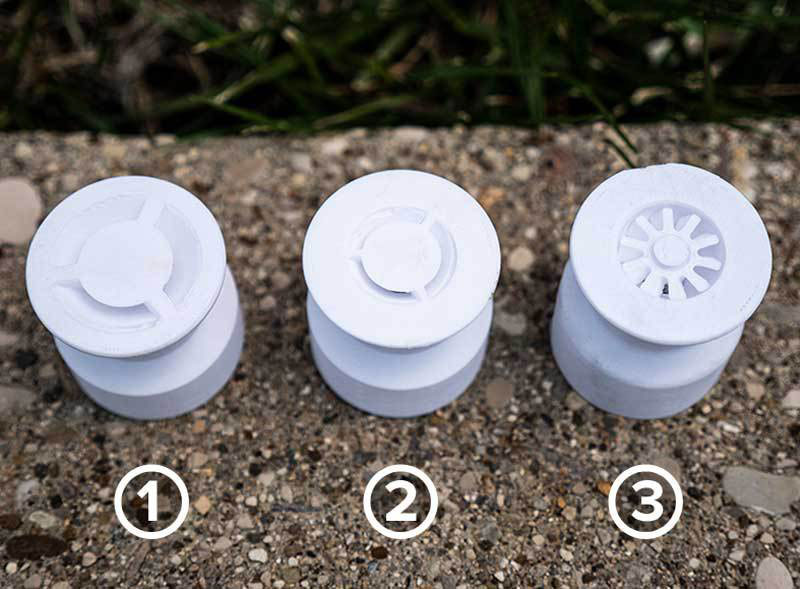 Wringing out our wet shirts, we moved on to test three more head designs. After a number of tries, we found that the most effective model included a spinning diffuser (number 3 in the photo). The diffuser and pin combination was printed as a single unit, not requiring any post assembly or support removal. This head design provided a good spray distance and nice water pattern.
Printing the Threads
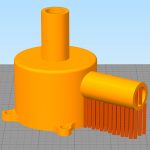
Printing the threads was another challenge. If the sprinkler body was printed sitting upright on its base, supports would need to be placed within the internal thread channel. These would be difficult to print and completely remove from the tight spaces.
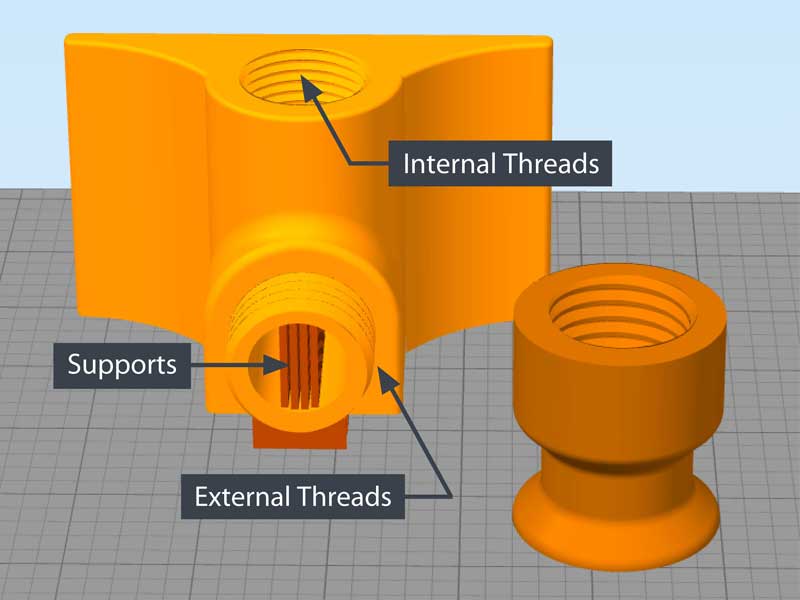 The best solution was to rotate the model 90 degrees, so the sprinkler was on its side while printing. Reorienting the part moved the required supports to the smooth inner walls of the external thread portion of the print. Success! It was much easier to reach into this area and remove the supports.
We’ve added the necessary supports to the downloadable factory file shared below. If you want to learn more about using supports, read this article.
We learned a lot from the process of creating the sprinkler model and trying out different designs. Now that we have perfected the sprinkler, it’s your turn to print it!
Getting Organized
Here’s what you will need to print your very own sprinkler:
Materials
- PETG filament (~100g) – You could also use PLA or ABS filament, but we recommend PETG for the best results. PLA won’t stand up to water and sun as well as PETG. Using ABS could lead to warping and shrinkage as the part cools.
Project Time
- Print time: 6 hours
- Assembly time: Seconds! If using PTFE tape to seal the threads, make sure to wrap it around the male threads in a counter-clockwise direction to ensure it stays in place.
Printing the Sprinkler
It’s time to get started! Simply follow these steps to print our tried-and-true sprinkler design:
1. Download the factory file
Get started by downloading the Sprinkler.factory file. The sprinkler including all required supports will be imported in the recommended orientation.
If you are a more advanced Simplify3D user, you may prefer downloading the STL file. If using the STL, you will need to manually add supports. Take a look at the factory file to see where supports should be placed.
 2. Add a process
Use the Add button to add a manufacturing process. This will load your last used profile, so it should be all set up for your printer.
Once you have named the process, make sure to adjust the Auto-Configure Material dropdown for the type of filament you’re using. Again, we recommend PETG for best results.
3. Set the right temperature for PETG filament
We used 245°C for the extruder and 75°C for the print bed. Applying glue stick to the print bed may help with first-layer adhesion. To learn more about bed adhesion, read our article for tips on getting the first layer to stick.
4. Adjust the support settings
Only the Sprinkler Main Body model requires supports. These have already been defined within the downloadable factory file.
To optimize these supports, make the following modifications. These adjustments will ensure your supports are stable and easy to remove when the print completes.
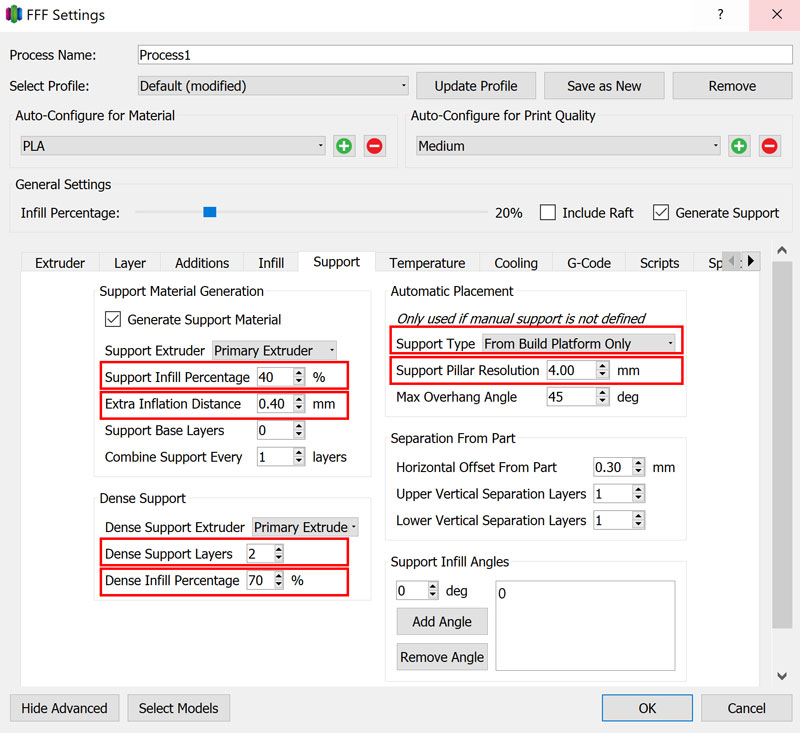
Navigate to the Support tab and:
-
- Choose a 40% Support Infill Percentage while also updating Dense Support Layers to 2 with a 70% Dense Infill Percentage. Making these adjustments will improve the quality of the surface above each support pillar.
- Set the Extra Inflation Distance to 0.4 mm for better support coverage.
- Select From Build Platform Only in the Support Type dropdown. This will prevent adding unnecessary supports to the Sprinkler Head model.
- Be sure Support Pillar Resolution is set to 4.00 mm to prevent supports from being created in the smaller cavities of the sprinkler head.
5. Adjust the layer height
A lower layer height will help improve overhang performance by reducing the horizontal displacement of each layer. As a result, the threads will create a tighter seal, the printed assembly will be watertight, and the print will be much stronger.
We recommend a 0.2 mm layer height to achieve a good balance of speed and quality. If you find that the threads are too weak or do not print well with your printer, you can achieve even better results by lowering the layer height to 0.1 mm.
6. Use the cooling fan
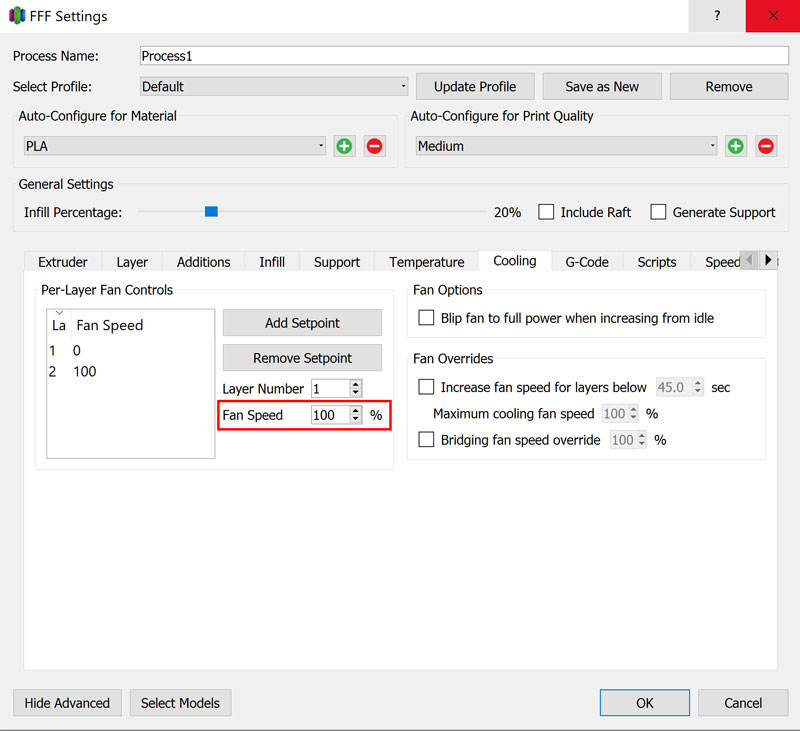 Go to the Cooling tab and make sure that your fan speed is at 100%. The fan will help with overhang performance. Overhangs will quickly cool and solidify in the correct position without drooping.
7. Other Recommendations
To save time while printing you can also choose to Combine Infill Every 2 layers within the process Infill tab. For more advanced users, try splitting processes with the Variable Settings Wizard. This will allow you to target areas that have threads with a lower layer height, but leave the rest of the model at .3 mm. Variable settings will help to achieve faster print times, while putting more plastic where it is needed most. Read this article to learn more about how to use the Variable Settings Wizard.
8. Customizing the Sprinkler Head
Want to make this sprinkler print your very own? Download the .STEP file so you can make any changes to the design in your CAD/CAM program of choice.
You’re all set to slice your model and print! Although a fun and straightforward print, this project touched on some essential 3D printing topics. We talked about the importance of selecting the right material and temperature, how part orientation affects supports, using the Variable Settings Wizard, and even the benefits of adjusting the layer height.
We hope you enjoy printing this sprinkler model as much as we had fun creating and testing it. We’d love to see your prints. Feel free to tag us in your social media posts or email us photos at stories@simplify3d.com.