Lessons From the Field – 3D Printed Ear Savers
Many of us have seen images of healthcare workers who’ve taken their mask off after a 12-hour shift. Their faces are covered in red lines and wrinkled skin from the pressure created by the elastic bands required to secure a respirator or surgical mask to their face. What you don’t see in those images is the irritation behind their ears from the strapping on the masks. Many users of masks also report headaches, chafing, and even blisters during prolonged use. In response, the additive manufacturing community has developed 3D printed tension relief bands for masks that help to alleviate many of these problems. In this post, we’ll share best practices for printing these ear savers.
Select an Approved Design
On the NIH Print Exchange, there are several models of ear-savers. Each design has the same purpose, to capture the mask strapping that normally loops around the user’s ears and distribute the pressure across the back of the head.
When selecting a design keep in mind that the size, shape, and rigidity of the band will impact how it feels in use. You may find that some designs work better for your particular mask or respirator. With short print times and low material cost, consider printing several of the designs to figure out which one works best for you.
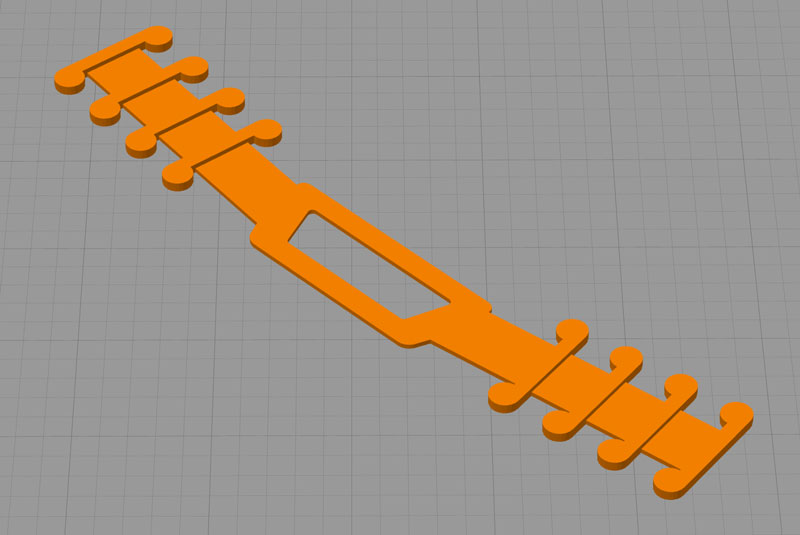 Surgical Mask Tension Release Band – This tension relief band strikes a balance between comfort and utility. The slightly curved frame is durable and flexible while maintaining four options for adapting the fit.
 Surgical Mask Band for Ear Comfort – Extra Security V2 – This design captures the mask strap with hooks set at four intervals. This is a useful feature when taking a mask on and off frequently. We found that the overhang created by the hook requires printing supports with the part.
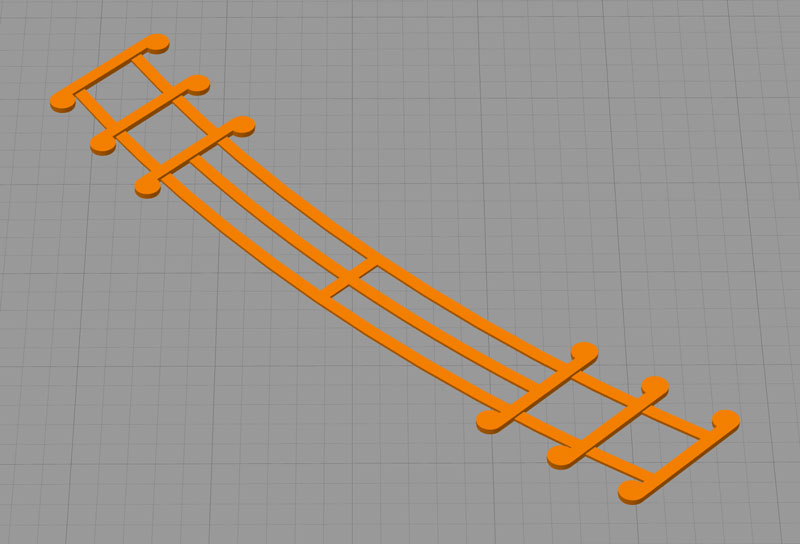 Ear Saver for Surgical Mask – This efficient model prints very quickly and is extremely lightweight. We suggest using this design if you need a long strap that can be disposed of at the end of the day because of the low material usage.
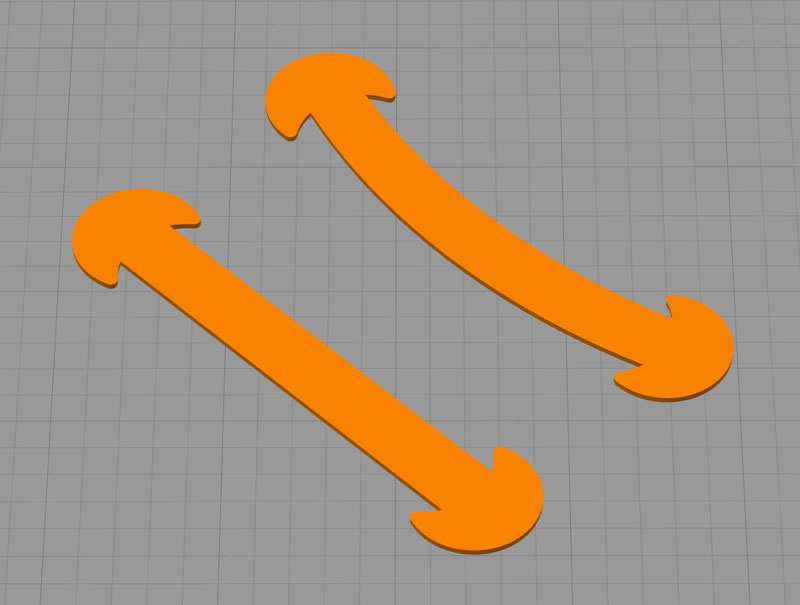 Mask Comfort Strap – This bone-shaped design is very simple and potentially disposable because of how fast it is able to be printed. This design is not adjustable and its default size is much shorter than other designs. This design is particularly useful if you are looking to create additional tension in your mask straps.
Source your Materials
Ear savers can be printed in nearly any filament type. By design, they are thin parts that conform to the back of the user’s head or neck. We found that filaments like PLA, which are not traditionally known to be a flexible filament, can be used to produce ear savers because the designs are so thin. We recommend avoiding filaments that warp heavily, like ABS, and materials that may have abrasive properties, like metal or wood-filled filaments. If you need additional information about a filament material, our Ultimate 3D Printing Materials Guide can help you get started.
The only other item you might want to have on hand is the mask or respirator that you will be using with the ear saver. You will likely want to test the fit of your device paired with the ear saver before finalizing your design decision, so make sure you have these items handy.
Optimize your Print Settings
We’ve gathered some best practices from the field to help you optimize your production efforts.
-
Increase the Perimeters
-
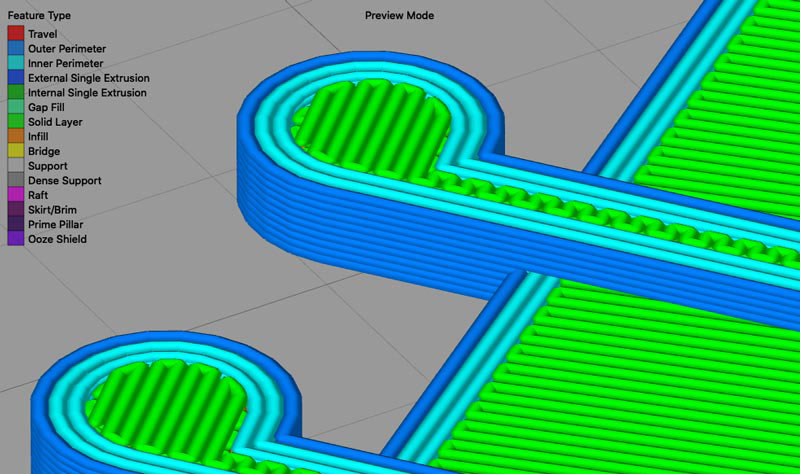 Adding an additional perimeter to your ear saver will make the mask strap connection point stronger.
 - Increasing from 2 to 3 perimeters will provide the necessary additional strength.
- Read more about thin walls and small features in this in-depth article.
-
-
Increase the Number of Top and Bottom Layers
-
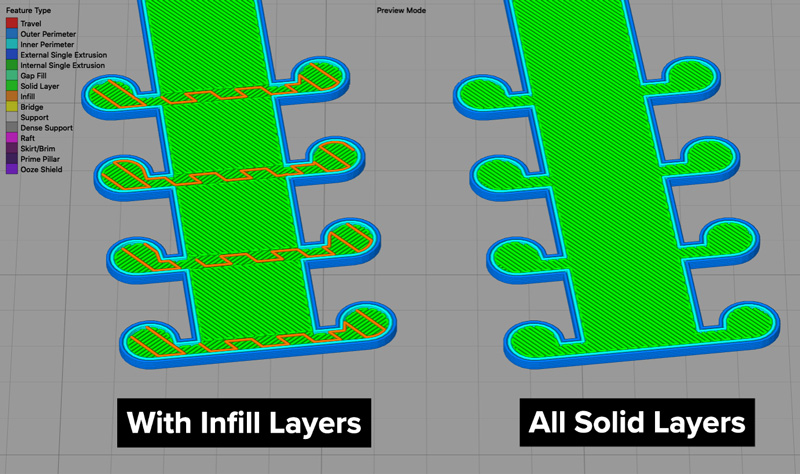 Most ear saver designs have 10 or fewer layers when printing at 0.2mm layer height. By increasing the number of top and bottom layers from 2 to 5, the part will be printed with 10 solid layers instead of adding fill layers between the top and bottom layers.
 - A solid layer will increase the strength of the part by avoiding infill intersections along the width of the band. These intersections have a higher tendency of failure during repeated use.
-
-
Fill the Print Bed
-
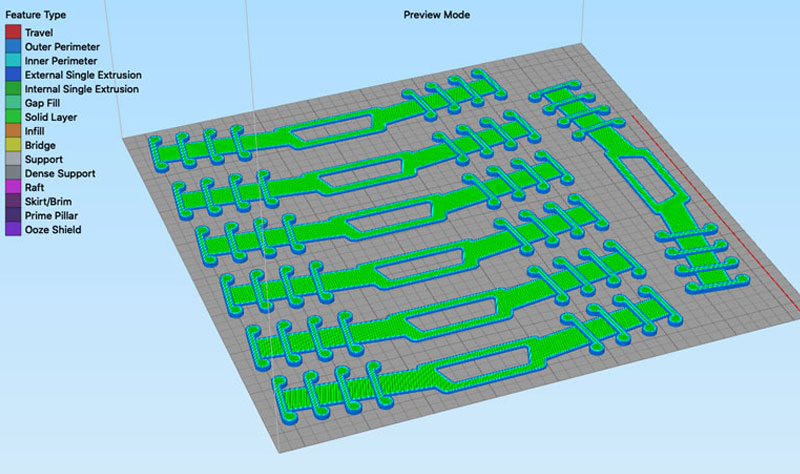 A single tension relief band can be printed in about 15 minutes. We suggest filling your print bed to optimize production. The goal is to spend less time starting and removing prints and more time printing.
 - Once you import a model, Ctrl+D (or Cmd+D on the Mac) will create duplicates on the build table.
- Click ‘Center and Arrange’ under the Model List to arrange your parts.
-
Putting your Print to Use
Ear savers are simple parts that are nearly ready for use as soon as they are done printing.
-
Removal from Print Bed
Ear savers are thin parts that require care when separating them from the print bed so that they don’t permanently bend while still warm.Allow the print bed to cool before attempting to separate the ear saver from the print bed or remove the ear saver by using a low-angle scraper to gently pry the part off the print bed.
-
Disinfect
The last step is to disinfect each band with a 10% bleach solution for 5 minutes to remove any contamination. The CDC has helpful tips about disinfection methods on this page.
-
Distribution
Ear savers will improve the day-to-day life for anyone who has to use a face mask for an extended period of time. We suggest calling medical facilities in your area to see if they can use 3D printed ear savers and then check with your social circles for individuals who could benefit from them.
Are you helping in the fight against COVID-19 using 3D printing technology? If you have participated in 3D printing efforts to support health care workers or know of new ways additive manufacturing is being used to combat COVID-19, please share your story with us at stories@simplify3d.com.