Improve 3D Print Quality by Preventing Those Pesky Blobs!
 You’ve waited hours for your 3D print to finish. Finally, the extruder stops, the print bed lowers, and the moment of truth has arrived. At first glance, the print looks perfect. But wait, what the heck? Are those blobs on the surface of the part?
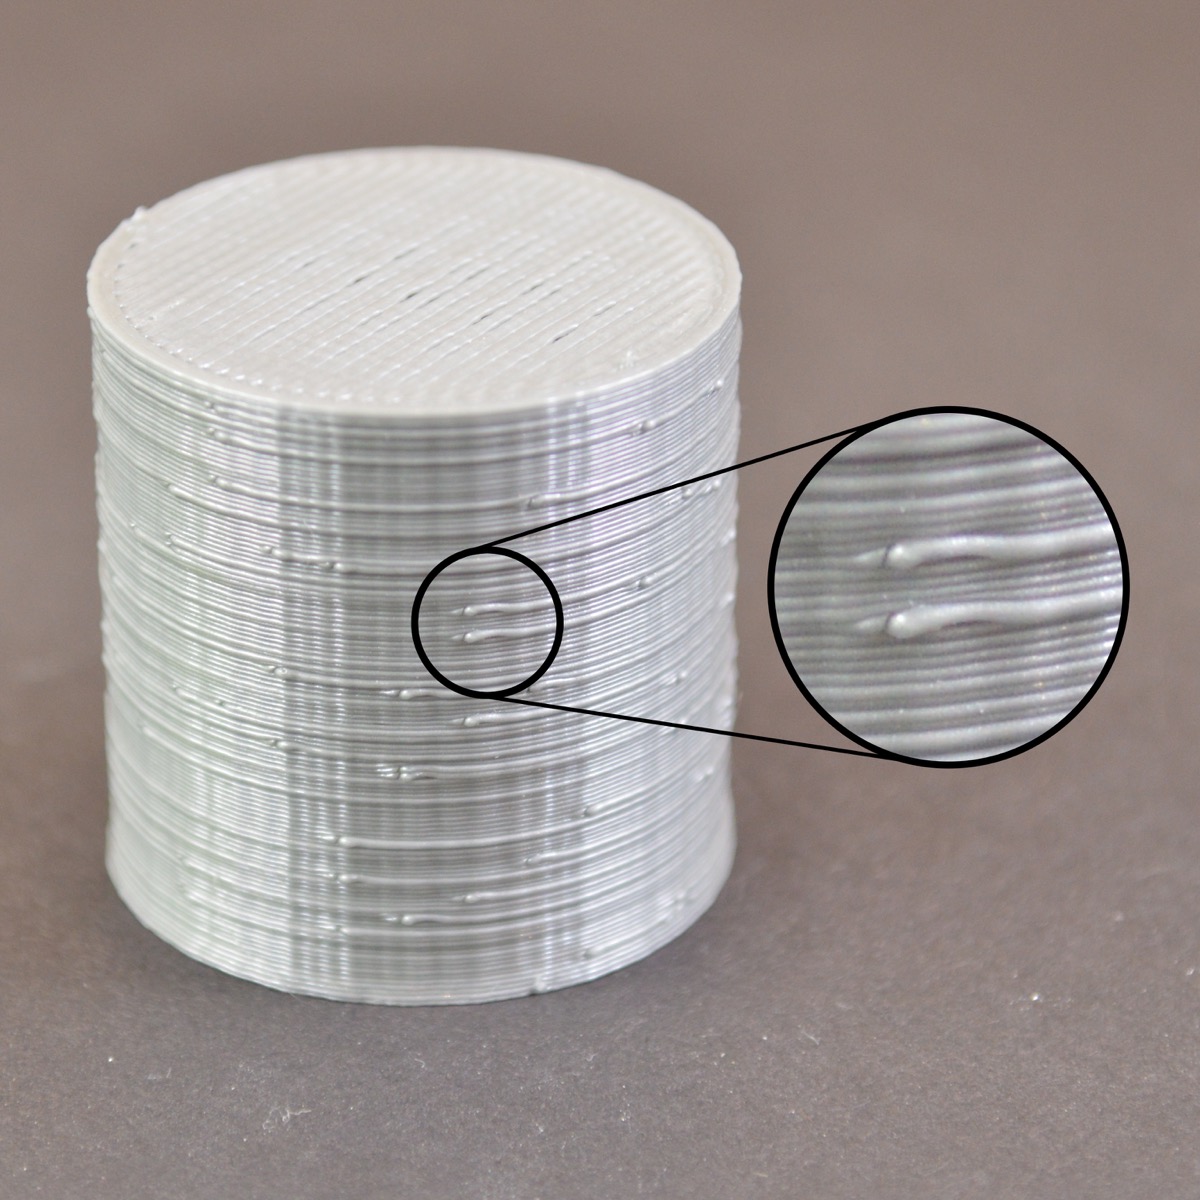
We’ve all felt that sinking feeling that comes with seeing blobs marring our 3D prints. Small surface imperfections, also called “zits,” are especially annoying when they appear on an otherwise perfect print. These blobs can occur because the extruder frequently starts and stops as it moves around during a print. The blobs represent the location where the extruder started printing a section of the outer shell of your model, then eventually returned to the same spot once it was done printing that perimeter. Joining two sections of plastic without leaving any sort of mark is not easy, but there are ways to help prevent those pesky blobs from appearing on the surface of your print. We cover them in detail in the Print Quality Troubleshooting Guide, but here’s a quick look at what might be causing surface defects.
Too much plastic
Before you can attempt to reduce blobs, it’s important to know where they are occurring. Watch your print in progress. Do blobs happen as the perimeter starts printing, or at the end of that layer as the extruder comes to a halt? If the blobs happen right at the beginning of the perimeter, it is possible the extruder is priming too much plastic. To counteract this, try adjusting your retraction settings to add a negative extra restart distance. For instance, if your retraction distance is 2.0mm, and you add an extra restart distance of -0.4mm, every time the extruder stops, it will retract 2.0mm of filament. But when it starts again, it will only push 1.6mm of filament back into the nozzle. Tweak this number until the blobs stop appearing. Detailed instructions on how to do this can be found in the Print Quality Troubleshooting Guide.
Built-up pressure inside the extruder
Blobs can occur when the built-up pressure inside the extruder nozzle pushes out more plastic than intended. If you notice that the blob is happening as the extruder finishes printing a perimeter, you may want to adjust a setting called “coasting.” This setting relieves some of the built-up pressure within the extruder by turning it off just before the end of the perimeter. Try turning this feature on and increasing the value until the blob no longer appears. Here are comprehensive instructions on how to adjust coasting.
Looking for even more ways to prevent 3D printing defects and improve quality? Visit the Print Quality Troubleshooting Guide for more solutions.