
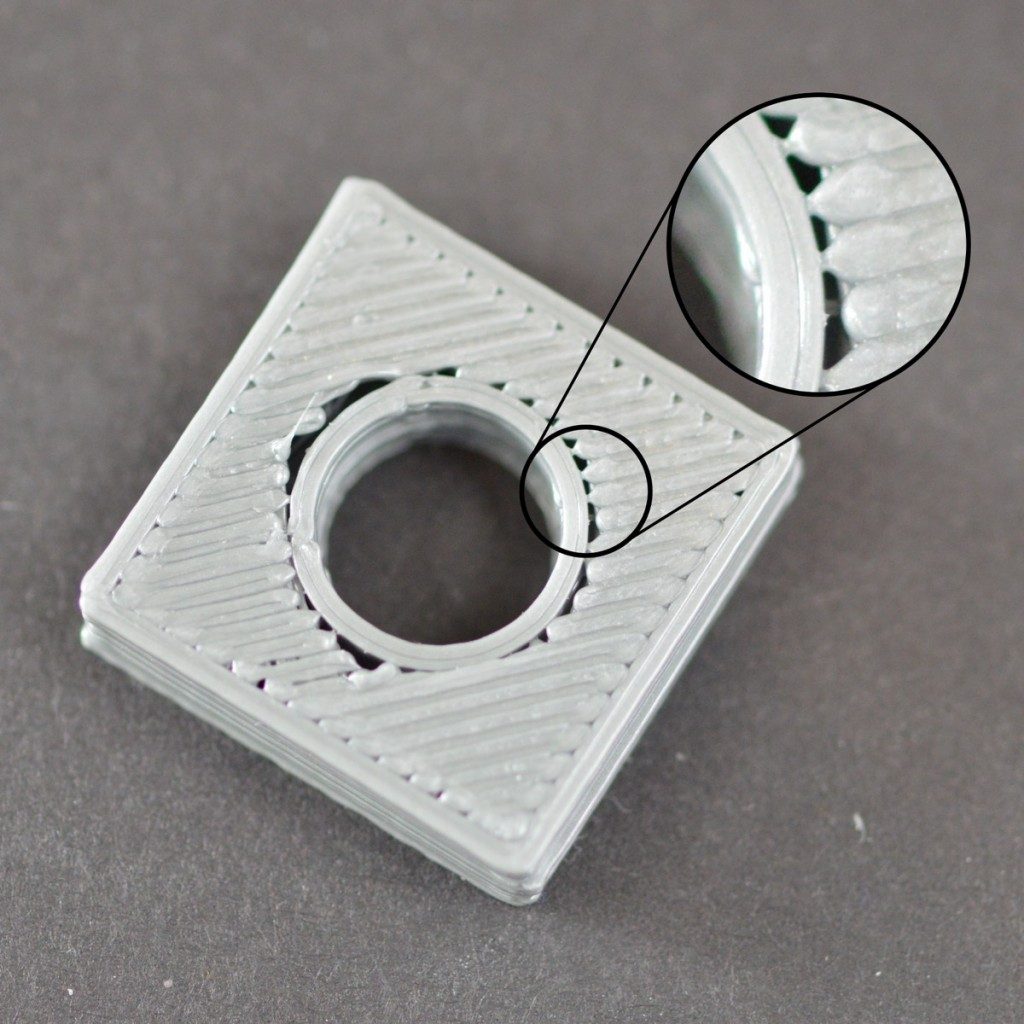
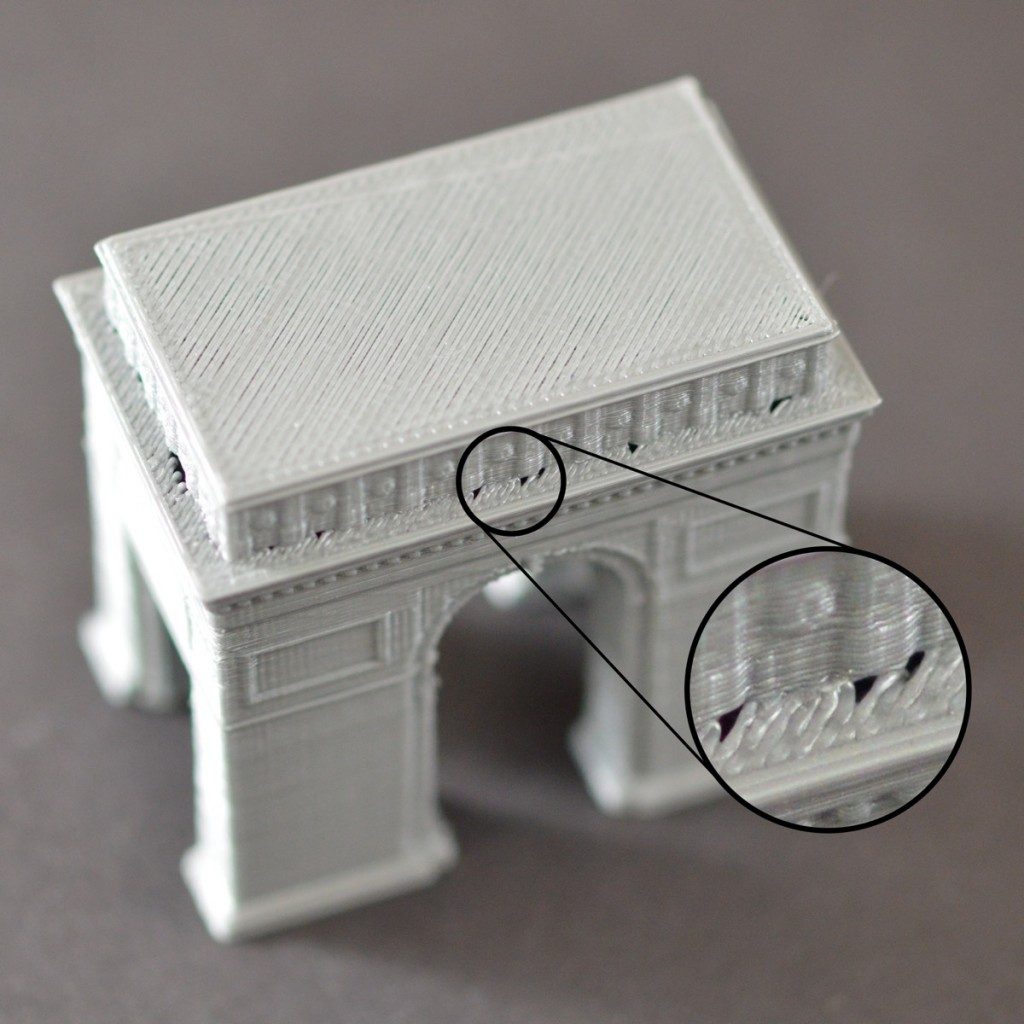
Gaps in Thin Walls
Because your 3D printer includes a fixed size nozzle, you may encounter issues when printing very thin walls that are only a few times larger than the nozzle diameter. For example, if you were trying to print a 1.0mm thick wall with a 0.4mm extrusion width, you may need to make some adjustments to ensure your printer creates a completely solid wall and does not leave a gap in the middle. Simplify3D already includes several dedicated settings to help with thin wall printing, so we will describe the relevant settings below.
Common Solutions
Adjust the thin wall behavior
The first settings that you need to verify are the dedicated thin wall settings that Simplify3D includes. To view these settings, click “Edit Process Settings” and select the Advanced tab. The software includes several different options for the Internal Thin Wall Type. The default option typically uses something called “gap fill” to fill the small gaps between your thin walls. This will create a back-and-forth infill pattern that adjusts to fill the space between these thin gaps. However, the software also includes another useful option that can fill these thin walls with a single pass. To enable this option, change the Internal Thin Wall Type to “Allow single extrusion fill”. This will use a dynamic single extrusion that will adjust in size to perfectly fill the gap between these walls. For more information about single extrusion options, click here to view our detailed article on the subject.
Change the extrusion width to fit better
In some cases, you may find that you have better luck changing the size of the plastic that is extruded from the nozzle. For example, if you were printing a 1.0mm thick wall, you could achieve a fast and strong print if your nozzle was setup to create a 0.5mm extrusion. This works best for parts that have fairly consistent wall thicknesses. You can adjust the extrusion width that the software creates by clicking “Edit Process Settings” and selecting the Extruders tab. Choose a manual extrusion width and enter a value of your choosing.
Related Topics
Gaps Between Infill and Outline
Gaps between the outline of the part and the outer solid infill layers
Gaps in Floor Corners
Gaps in the corners of the print, where the top layer does not join to the outline of the next layer
Small Features Not Printed
Very small features are not printed or are missing from the software preview

Inconsistent Extrusion
Extrusion amount tends to vary and is not consistent enough to produce an accurate shape