
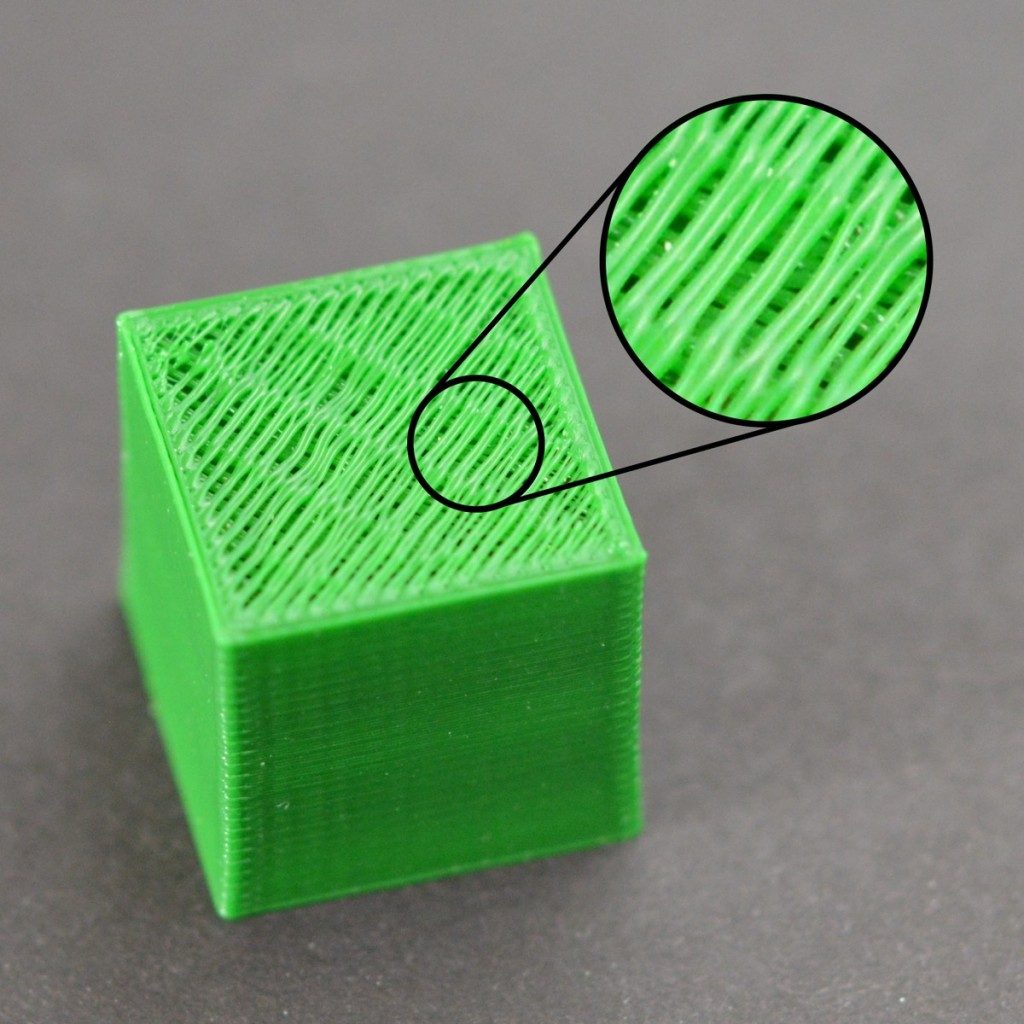
Under-Extrusion
Each profile in Simplify3D includes settings that are used to determine how much plastic the 3D printer should extrude. However, because the 3D printer does not provide any feedback about how much plastic actually leaves the nozzle, it’s possible that there may be less plastic exiting the nozzle than what the software expects (otherwise known as under-extrusion). If this happens, you may start to notice gaps between adjacent extrusions of each layer. The most reliable way to test whether or not your printer is extruding enough plastic is to print a simple 20mm tall cube with at least 3 perimeter outlines. At the top of the cube, check to see if the 3 perimeters are strongly bonded together or not. If there are gaps between the 3 perimeters, then you are under-extruding. If the 3 perimeters are touching and do not have any gaps, then you are likely encountering a different issue. If you determine that you are under-extruding, there are several possible causes for this, which we have summarized below.
Common Solutions
Incorrect filament diameter
The first thing you want to verify is that the software knows the filament diameter that you are using. You can find this setting by clicking “Edit Process Settings” and going to the Other tab. Check to make sure that this value matches the filament that you purchased. You may even want to measure your filament yourself using a pair of calipers to make sure that you truly have the correct diameter specified in the software. The most common values for the filament diameter are 1.75mm and 2.85mm. Many spools of plastic also include the correct diameter on the packaging.
Increase the extrusion multiplier
If your filament diameter is correct, but you are still seeing under-extrusion issues, then you need to adjust your extrusion multiplier. This is a very useful setting in Simplify3D that allows you to easily modify the amount of plastic that is extruded (otherwise known as the flow rate). You can find this setting by clicking “Edit Process Settings” and going to the Extruder tab. Each extruder on your printer can have a unique extrusion multiplier, so if you are trying to modify the flow rate for a specific extruder, make sure to select it from the list on the left to load the settings for that extruder. As an example, if your extrusion multiplier was 1.0 previously and you change it to 1.05, it means you will be extruding 5% more plastic than you were previously. It is typical for PLA to print with an extrusion multiplier near 0.9, while ABS tends to have extrusion multipliers closer to 1.0. Try increasing your extrusion multiplier by 5%, and then reprint the test cube to see if you still have gaps between your perimeters.
Related Topics
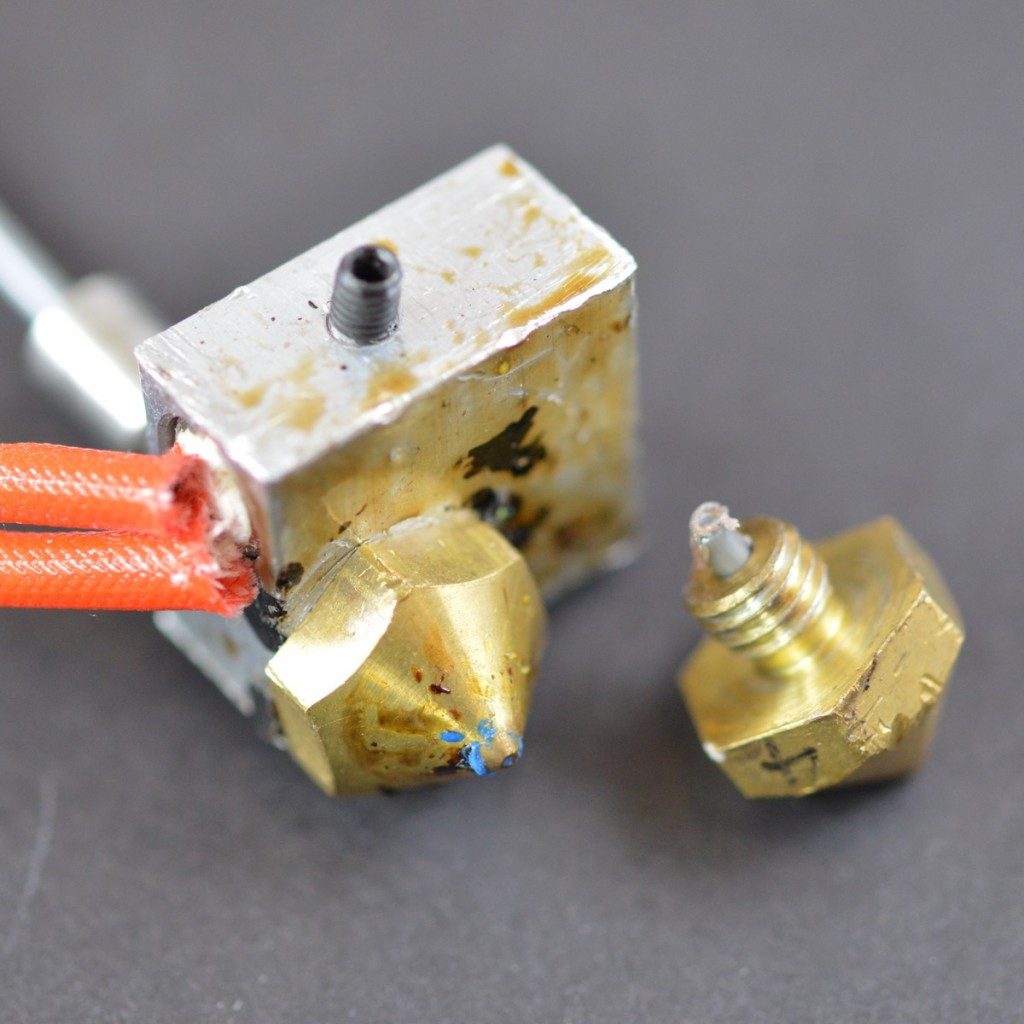
Clogged Extruder
Extruder is clogged or jammed and will no longer extrude plastic from the nozzle tip
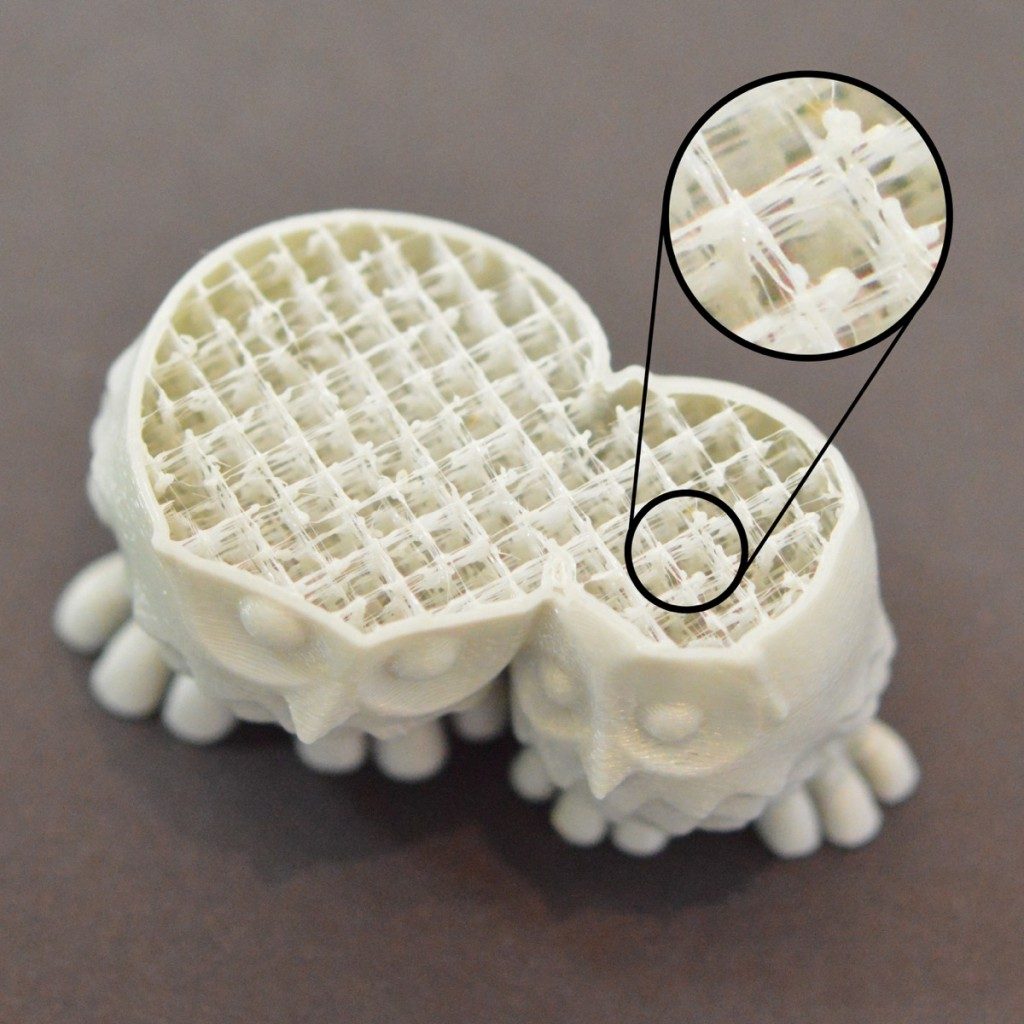
Weak Infill
Very thin, stringy infill that creates a weak interior and does not bond together well
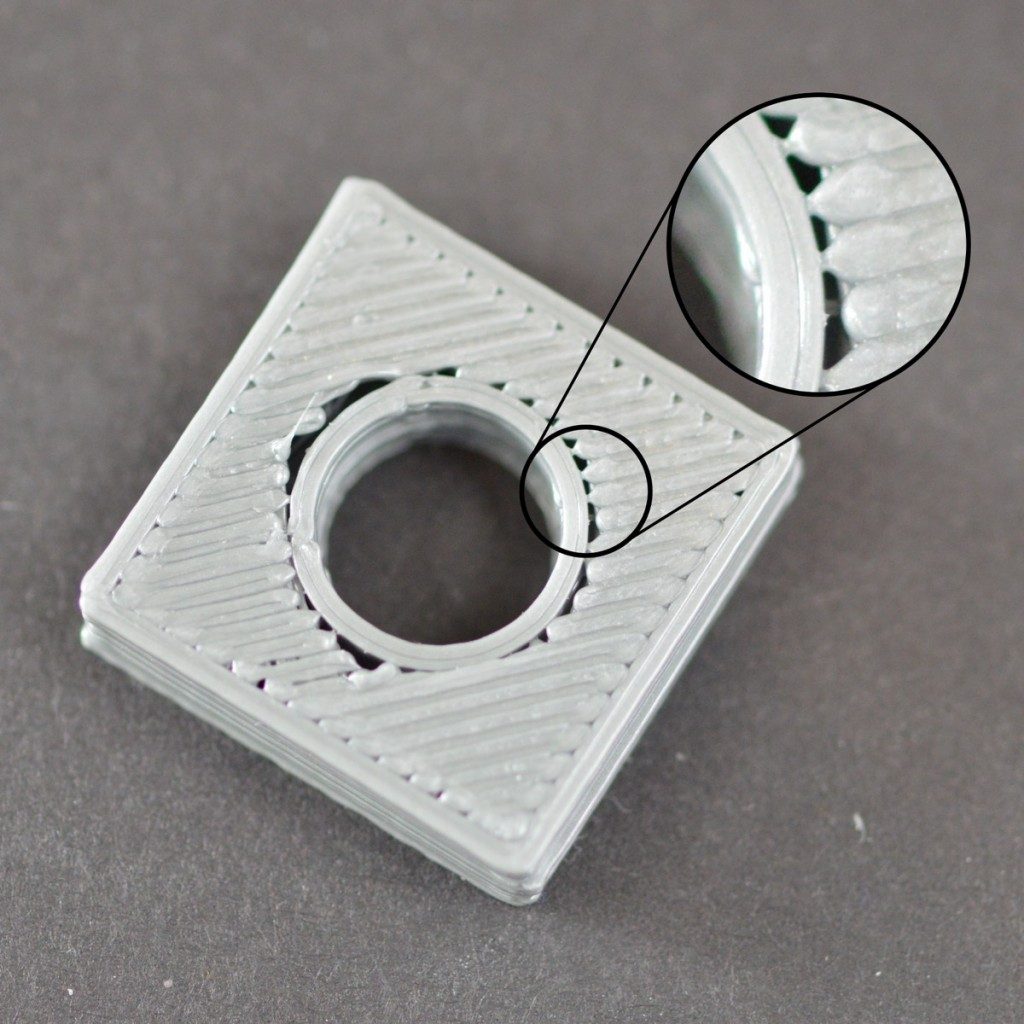
Gaps Between Infill and Outline
Gaps between the outline of the part and the outer solid infill layers