Overheating
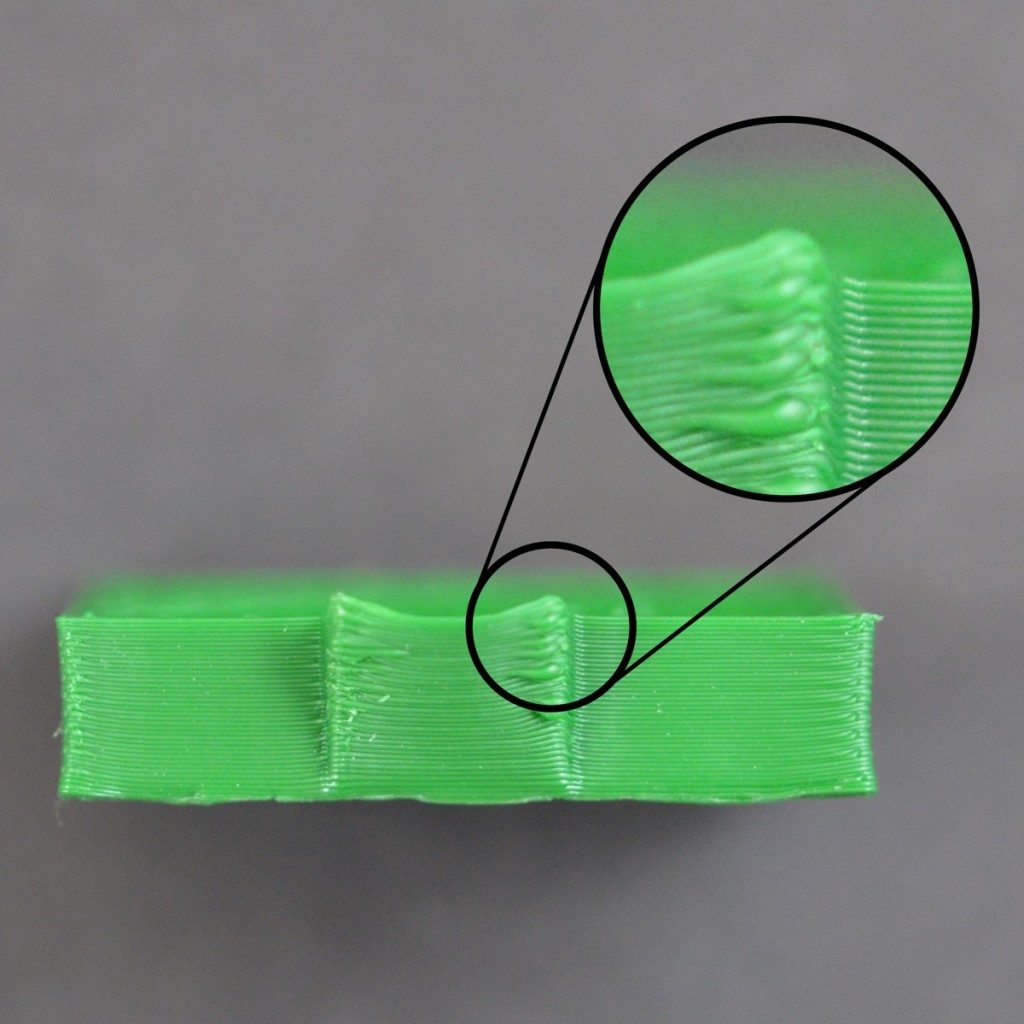
The plastic that exits your extruder may be anywhere from 190 to 310 degrees Celsius. While the plastic is still hot, it is pliable and can easily be formed into different shapes. However, as it cools, it quickly becomes solid and retains its shape. You need to achieve the correct balance between temperature and cooling so that your plastic can flow freely through the nozzle, but it can quickly solidify to maintain the exact dimensions of your 3D printed part. If this balance is not achieved, you may start to notice some print quality issues where the exterior of your part is not as precise and defined as you would like. As you can see in the image on the left, the filament extruded at the top of the pyramid was not able to cool quickly enough to retain its shape. The section below will examine several common causes for overheating and how to prevent them.
Common Solutions
Insufficient Cooling
The most common cause for overheating is that the plastic is not being cooled fast enough. When this happens, the hot plastic is free to change shapes as it slowly cools. For many plastics, it is much better to quickly cool the layers to prevent them from changing shape after being printed. If your printer includes a cooling fan, try increasing the power of the fan to cool the plastic faster. You can do this by clicking “Edit Process Settings” and selecting the Cooling tab. Simply double-click on the fan speed setpoint you wish to edit. This additional cooling will help the plastic retain its shape. If your printer does not include an integrated cooling fan, you may want to try installing an aftermarket fan or using a small handheld fan to cool down the layers faster.
Printing at too high of a temperature
If you are already using a cooling fan and you are still seeing this issue, you may want to try printing at a lower temperature. If the plastic is extruded at a lower temperature it will be able to solidify faster and retain its shape. Try lowering the print temperature by 5-10 degrees to see if it helps. You can do this by clicking “Edit Process Settings” and selecting the Temperature tab. Simply double-click the temperature setpoint you wish to change. Be careful not to lower the temperature too far, as otherwise the plastic may not be hot enough to extrude through the small opening in your nozzle.
Printing too fast
If you are printing each layer very quickly, you might not allow enough time for the previous layer to properly cool before you are trying to deposit the next layer of hot plastic on top of it. This is particularly important for very small parts where each layer only requires a few seconds to print. Even with a cooling fan, you may still need to decrease the printing speed for these small layers to ensure you provide enough time for the layer to solidify. Thankfully, Simplify3D includes a very simple option to do exactly that. If you click on “Edit Process Settings” and select the Speeds tab, you will see a section labeled “Speed Overrides.” This section is used to automatically slow down the printing speed for small layers to ensure they have enough time to cool and solidify before printing the next layer. For example, if you allow the software to adjust the printing speed for layers that take less than 15 seconds to print, the program will automatically slow down the printing speed for these small layers. This is a vital feature for combating these overheating issues.
When all else fails: Try printing multiple parts at once
If you have already tried the 3 items above and you are still having trouble achieving sufficient cooling, there’s one more thing you can try. Create a copy of the part you are trying to print (Edit > Copy/Paste) or import a second object that can be printed at the same time. By printing two objects at once, you can provide more cooling time for each individual part. The hot nozzle will need to move to a different location on the build platform to print the second part, which provides a short relief for your first part to cool down. This is a simple, yet very effective strategy for fixing overheating problems.
Related Topics
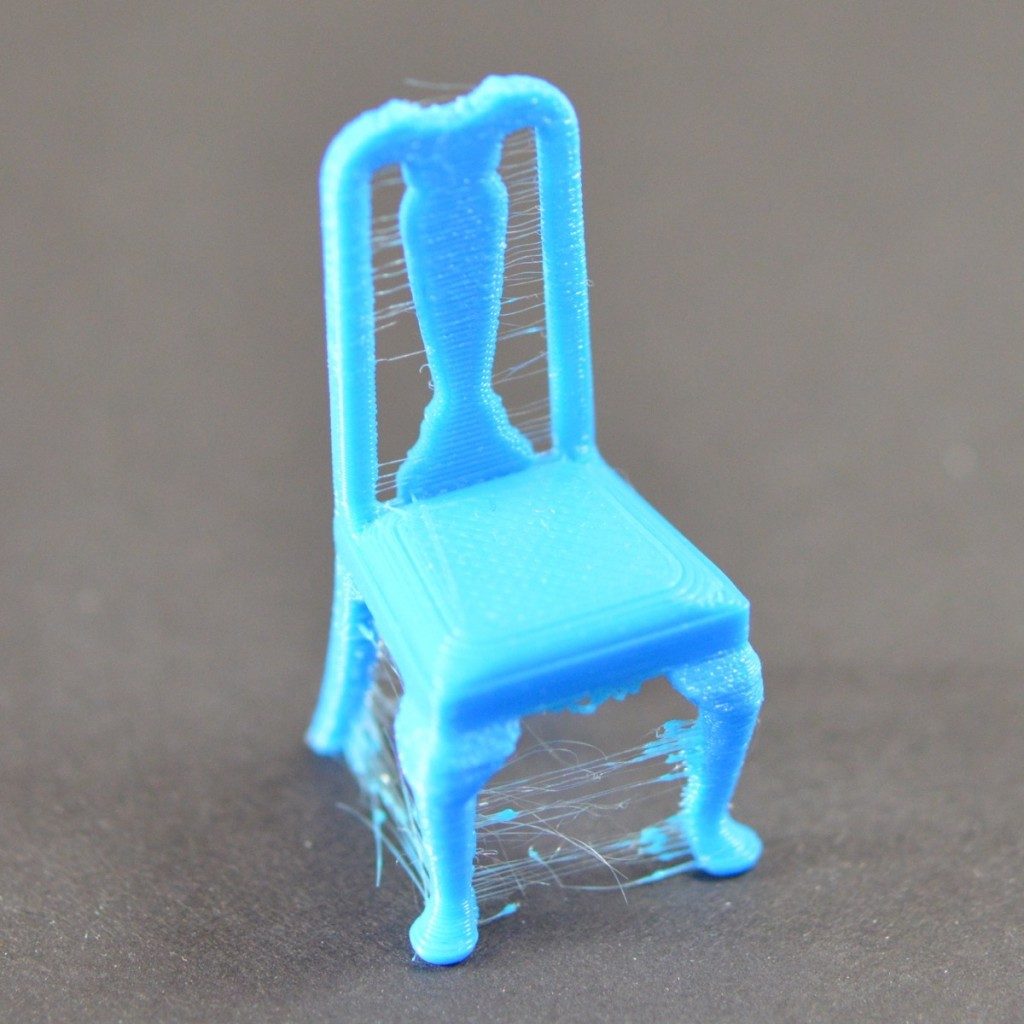
Stringing or Oozing
Lots of strings and hairs left behind when moving between different sections of the print
Curling or Rough Corners
Corners of the print tend to curl and deform after they are printed