
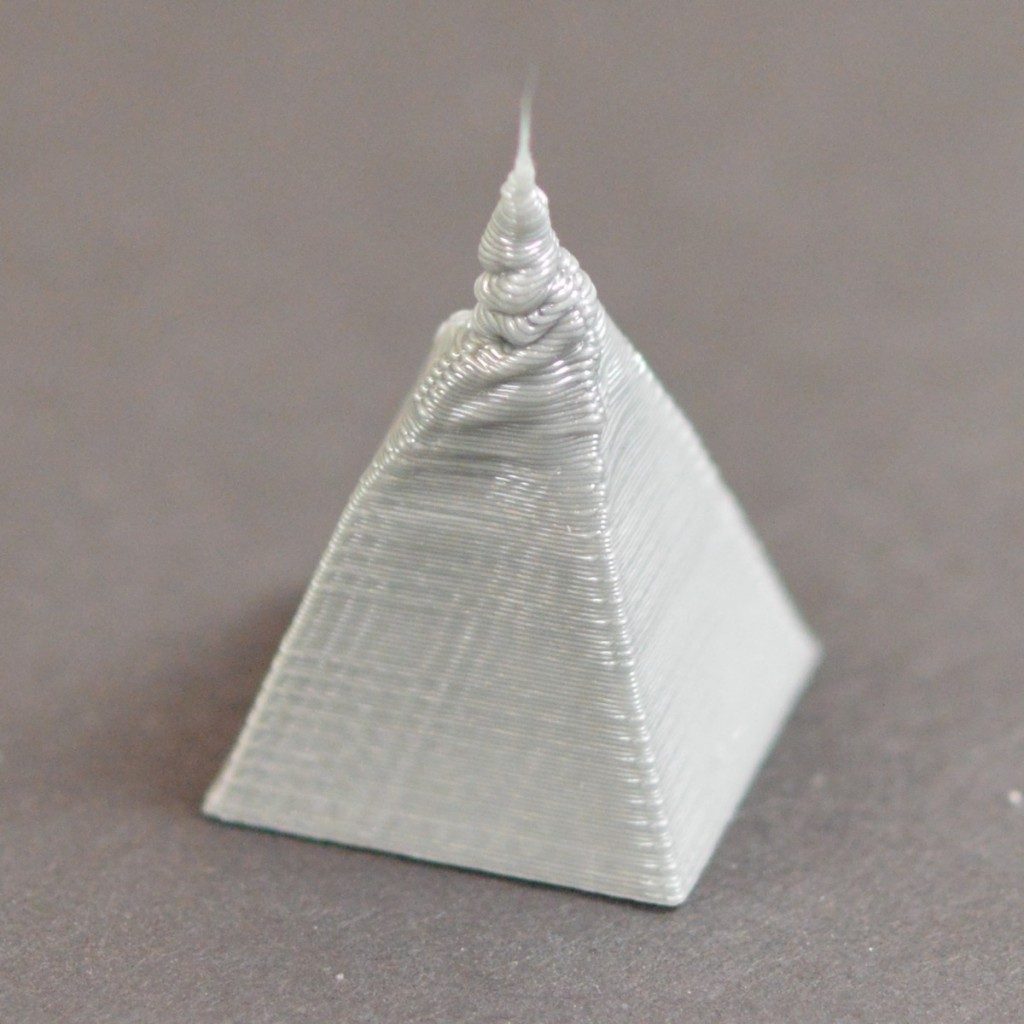
Blobs and Zits
During your 3D print, the extruder must constantly stop and start extruding as it moves to different portions of the build platform. Most extruders are very good at producing a uniform extrusion while they are running, however, each time the extruder is turned off and on again, it can create extra variation. For example, if you look at the outer shell of your 3D print, you may notice a small mark on the surface that represents the location where the extruder started printing that section of plastic. The extruder had to start printing the outer shell of your 3D model at that specific location, and then it eventually returned to that location when the entire shell had been printed. These marks are commonly referred to as blobs or zits. As you can imagine, it is difficult to join two pieces of plastic together without leaving any mark whatsoever, but there are several tools in Simplify3D that can be used to minimize the appearance of these surface blemishes.
Common Solutions
Retraction and coasting settings
If you start to notice small defects on the surface of your print, the best way to diagnose what is causing them is to watch closely as each perimeter of your part is printed. Does the defect appear the moment the extruder starts printing the perimeter? Or does it only appear later when the perimeter is completed and the extruder is coming to a stop? If the defect appears right away at the beginning of the loop, then it’s possible your retraction settings need to be adjusted slightly. Click on “Edit Process Settings” and go to the Extruders tab. Right below the retraction distance, there is a setting labeled “Extra Restart Distance.” This option determines the difference between the retraction distance when the extruder is stopping and the priming distance that is used when the extruder is restarting. If you notice a surface defect right at the beginning of the perimeter, then your extruder is likely priming too much plastic. You can reduce the priming distance by entering a negative value for the extra restart distance. For example, if your retraction distance is 1.0mm, and the extra restart distance is -0.2mm (note the negative sign), then each time your extruder stops, it will retract 1.0mm of plastic. However, each time the extruder has to start extruding again, it will only push 0.8mm of plastic back into the nozzle. Adjust this setting until the defect no longer appears when the extruder initially begins printing the perimeter.
If the defect does not occur until the end of the perimeter when the extruder is coming to a stop, then there is a different setting to adjust. This setting is called coasting. You can find it right below the retraction settings on the Extruder tab. Coasting will turn off your extruder a short distance before the end of the perimeter to relieve the pressure that is built up within the nozzle. Enable this option and increase the value until you no longer notice a defect appearing at the end of each perimeter when the extruder is coming to a stop. Typically, a coasting distance between 0.2-0.5mm is enough to have a noticeable impact.
Avoid unnecessary retractions
The retraction and coasting settings mentioned above can help avoid defects each time the nozzle retracts, however, in some cases, it is better to simply avoid the retractions all together. This way the extruder never has to reverse direction and can continue a nice uniform extrusion. This is particularly important for machines that use a Bowden extruder, as the long distance between the extruder motor and the nozzle makes retractions more troublesome. To adjust the settings that control when a retraction takes place, go to the Advanced tab and look for the “Ooze Control Behavior” section. This section contains many useful settings that can modify the behavior of your 3D printer. As was mentioned in the Stringing or Oozing section, retractions are primarily used to prevent the nozzle from oozing as it moves between different parts of your print. However, if the nozzle is not going to cross an open space, the oozing that occurs will be on the inside of the model and won’t be visible from the outside. For this reason, many printers will have the “Only retract when crossing open spaces” option enabled to avoid unnecessary retractions.
Another related setting can be found in the “Movement Behavior” section. If your printer is only going to retract when crossing open spaces, then it would be beneficial to avoid these open spaces as much as possible. Simplify3D includes an extremely useful feature that can divert the travel path of the extruder to avoid crossing an outline perimeter. If the extruder can avoid crossing the outline by changing the travel path, then a retraction won’t be needed. To use this feature, simply enable the “Avoid crossing outline for travel movement” option.
Non-stationary retractions
Another extremely useful feature in Simplify3D is the ability to perform non-stationary retractions. This is particularly useful for bowden extruders that build up a lot of pressure inside the nozzle while printing. Typically when these types of machines stop extruding, the excess pressure is still likely to create a blob if the extruder is standing still. So Simplify3D has added a unique option that allows you to keep the nozzle moving while it performs its retraction. This means you are less likely to see a stationary blob since the extruder is constant moving during this process. To enable this option, we have to adjust a few settings. First, click “Edit Process Settings” and go to the Extruder tab. Make sure that the “Wipe Nozzle” option is enabled. This will tell the printer to wipe the nozzle at the end of each section when it stops printing. For the “Wipe Distance”, enter a value of 5mm as a good starting point. Next, go to the Advanced tab and enable the option labeled “Perform retraction during wipe movement”. This will prevent a stationary retraction, since the printer has now been instructed to wipe the nozzle while it retracts. This is a very powerful feature and a great option to try if you are still having trouble removing these defects from the surface of your print.
Choose the location of your start points
If you are still seeing some small defects on the surface of your print, Simplify3D also provides an option that can control the location of these points. Click on “Edit Process Settings” and select the Layer tab. In most cases, the locations of these start points are chosen to optimize the printing speed. However, you also have the ability to randomize the placement of the start points or align them to a specific location. For example, if you were printing a statue, you could align all of the start points to be on the backside of the model so that they were not visible from the front. To do this, enable the “Choose start point that is closest to specific location” option and then enter the XY coordinate where you want the start points to be placed.
Related Topics

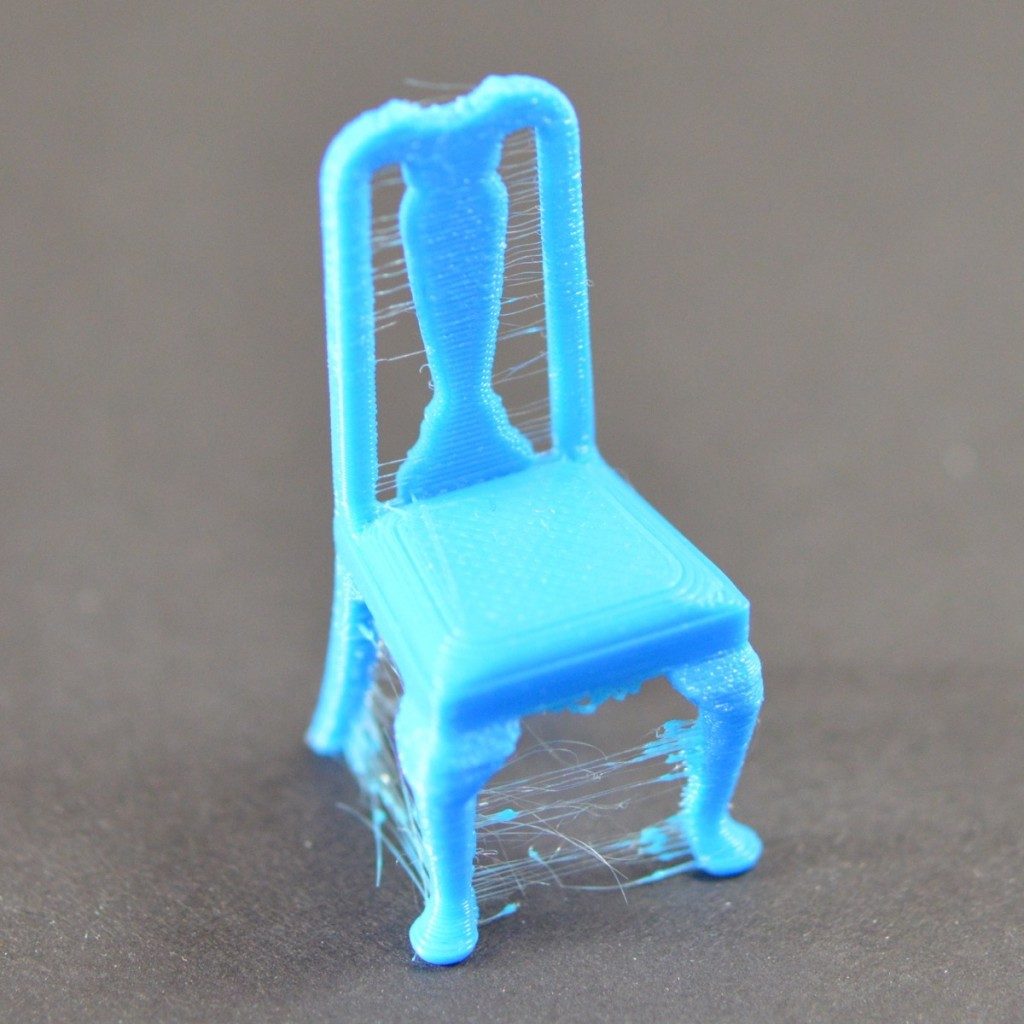
Stringing or Oozing
Lots of strings and hairs left behind when moving between different sections of the print
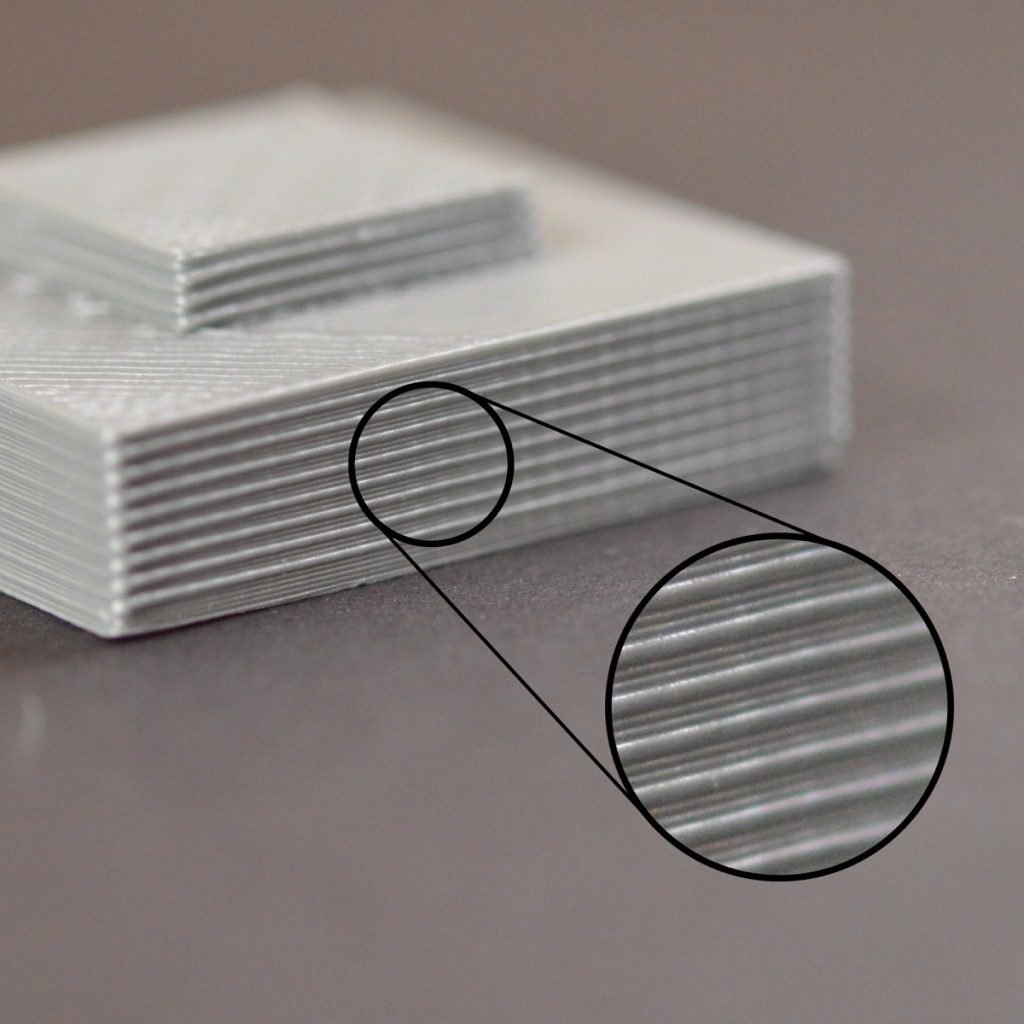
Lines on the Side of Print
Side walls are not smooth, lines are visible on the side of the print