Perfecting the First Layer
 A successful first layer is vital to a successful print. This tutorial will guide you through the steps to ensure that your first layer sticks to the bed every time.
While it might be tempting to start printing, the first step is to make sure your machine is properly calibrated and leveled. The leveling process varies according to the printer, but the most common bed leveling mechanism is a spring tightening system. A series of springs are located underneath the build plate, and tightening or loosening the springs will lower or raise the bed.
Working with the Machine Control Panel
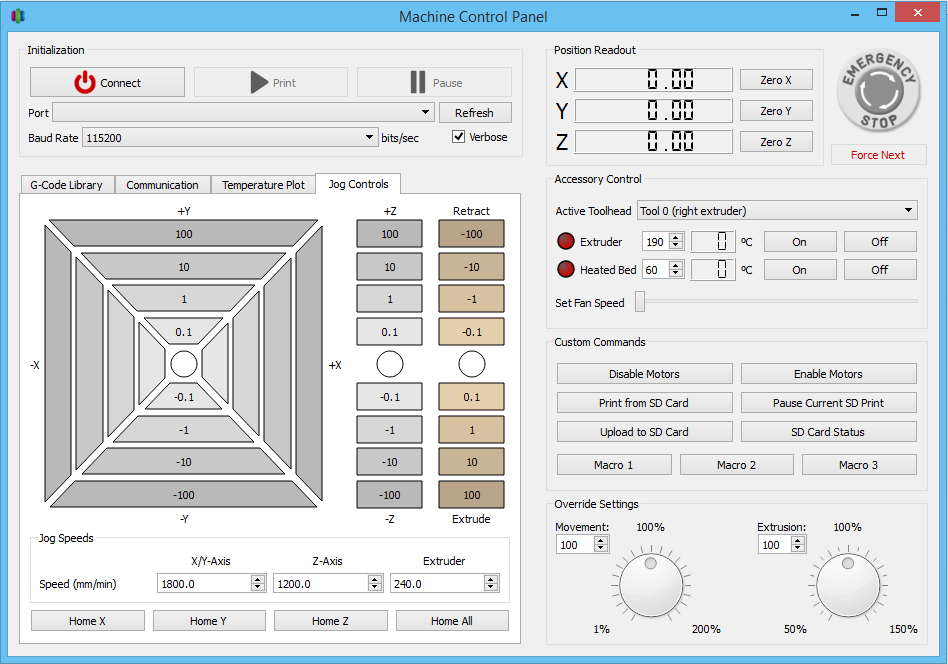 To level your bed, you will be using the Machine Control Panel in the Simplify3D Software. There are two ways to access this dialog box, 1) from Tools > Machine Control Panel, or 2) from the Toolbar (the gear icon).
From the Machine Control Panel, click on Jog Controls. Plug the USB cable from the printer into your computer and click Refresh to repopulate the Port listing. Locate your printer in the drop-down menu and click Connect. Once you are connected, click on the Jog Controls tab; then click Home All.
Once you are “homed,” minimize the Machine Control Panel. We will be revisiting it later on in the tutorial.
Bed Leveling Wizard

To start leveling your bed you will need to tighten down your springs until the bed is about 0.2mm away from the nozzle tip. Then open the Bed Leveling Wizard from the Tools tab of the horizontal menu bar. Click Begin Leveling and your extruder will home automatically.
Click Next and the extruder will move to the first leveling position at the corner of your bed. We will now use an ordinary piece of paper as a spacer as we adjust the leveling screws around all four corners of your bed (often referred to as the Paper Test). At your first leveling position, slide a piece of paper on your bed and slowly loosen your spring until the paper drags under the nozzle but can still be moved.
Click Next and the print head will move to the opposite corner of the bed. Continue leveling around all the corners. Then repeat the entire process so that you have leveled each corner twice.
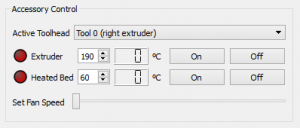 After leveling your bed, re-open the Machine Control Panel; then click Accessory Control where you will pre-heat your bed and extruders.
Use the Active Toolhead drop-down menu to select the extruder you would like to heat. Directly under the drop-down menu, you’ll find the temperature setting boxes for the Extruder and Heated Bed. Use the up-down arrows to set your desired temperature; then click On to start the heaters. The red light to the left of the heating element will glow during the heating process.
While your machine is heating, you can continue to work in the software to import, slice and preview your part.
Tip: Many users report better results on their first layer through use of an adhesive material applied to the print bed. This can include a standard glue stick, hairspray or even painter’s tape. Users are encouraged to share their results and discuss new methods on the Simplify3D forums.
Test Print
Now that you have finished calibrating your bed and set your temperatures, the next step is to set up a test print. It’s a good idea to use a large symmetrical part so you can evaluate consistency in all corners of the print.
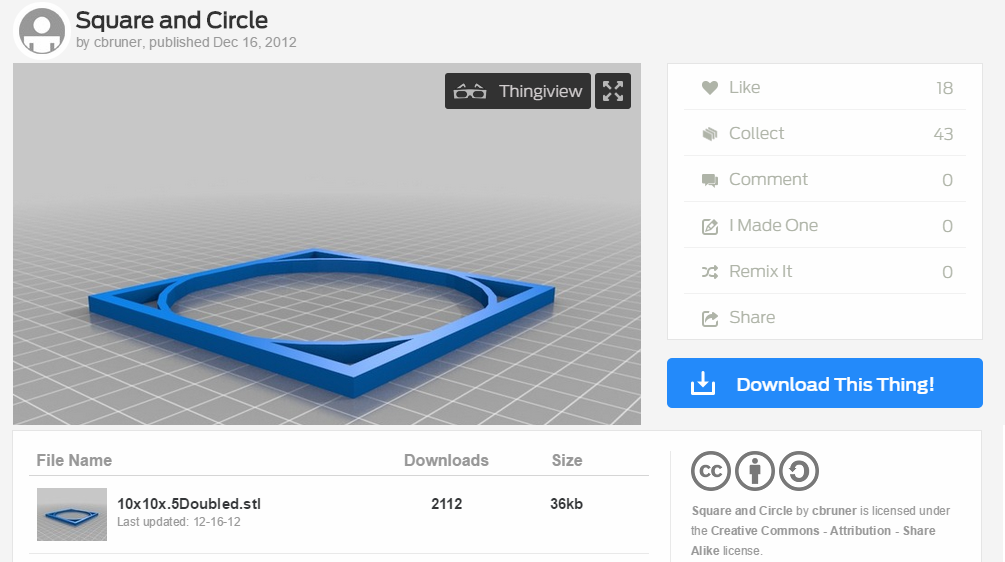
We chose “Square and Circle” by cbruner from Thingiverse. Import the “10x10x.5 Double.stl” into the Models section of your Simplify3D Software. For instructions on importing, you can also reference our Tutorial on Importing and Manipulating Models.
Adding a Process
After importing the model, the next step is to give your part a Process (a process is a compilation of instructions that tell your machine how to execute the build sequence). It is possible to add multiple processes within the same model, but for this simple test print, we will use just one process. To learn how to apply Multiple Processes, see our tutorial on Different Settings for Different Regions of a Model.
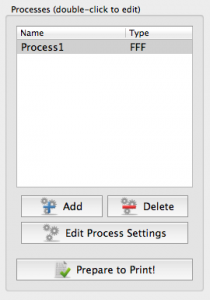
When you select your printer in the Configuration Assistant, one process is automatically added. If you do not see Process1 in the window, click the Add button; your process will be added and the FFF Settings window will appear.
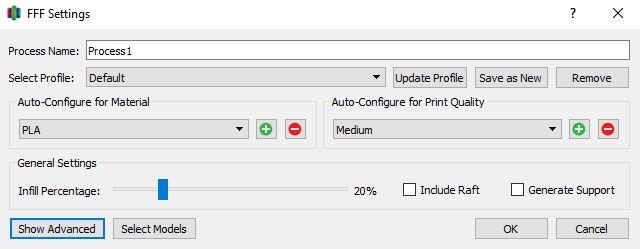
The FFF Settings window opens in its abbreviated size showing you the most common selections, such as printer profile, the quality of your part, and the material you will be using. However, we want to modify some additional settings, so click Show Advanced in the lower left corner to see the entire menu of process settings. (Tip: double-click on a Process to open the FFF Settings window.)
 In the expanded FFF window, click the Additions tab and look for Skirt Settings. A skirt is an outline of filament that surrounds your part. Skirts are a great tool to ensure the success of your test print because they prime your extruder, clean out any clogs, and help establish an even flow. Skirts help identify bed leveling errors so you can correct any flaws before printing the main part.
In the Layer tab, look for First Layer Settings where you can modify several important variables; layer height, line width, and speed. the software will provide suggested starting points, but you can adjust these variables depending on the model you are printing.
For our model, we are using 35% for our First Layer Speed. In general, you want the speed of your first layer to be reduced, typically 30-50% speed, to allow extra time for the filament to gain contact with the bed and stick.
The First Layer Height determines the thickness of the first layer that is printed on the bed. For example, if you were using a layer height of 0.1mm, you could set your First Layer Height to 200% so that the first layer is printed with double thickness at 0.2mm. The software will automatically extrude twice as much plastic to account for the thicker first layer. The increased thickness of the first layer can help absorb small defects in the build plate and provide more surface contact area, which will result in better first layer adhesion.
Another feature is the ability to change the First Layer Width. By increasing the First Layer Width, many users find that their first layer prints out much smoother and sticks to the bed much easier. Printers with smaller nozzle sizes may benefit from this change. We recommend sticking to values within 100 to 200%.
Once you have set the appropriate first layer height, width, and speed, you may find that the first layer is sized correctly, but it is printing too close or too far away from the bed. To adjust the placement of the first layer, you can adjust the Global Z-axis Offset on the G-Code tab. Negative values will bring the nozzle closer to the bed and positive values will move the nozzle away from the bed. If you would prefer the first layer to be squished, a value of -0.05mm will be a good start. For a layer height of 0.2mm, this will give about 25% squish. Another way to think of this is that 100% of your extrusion will be forced into a space that is 75% of the layer height.
For the test print, we set the First Layer height to 100%. Make any additional adjustments to your First Layer Settings or Global G-Code Z offsets, then click OK to save the changes. Finally, click “Prepare to Print” to open the animated preview of your build process.
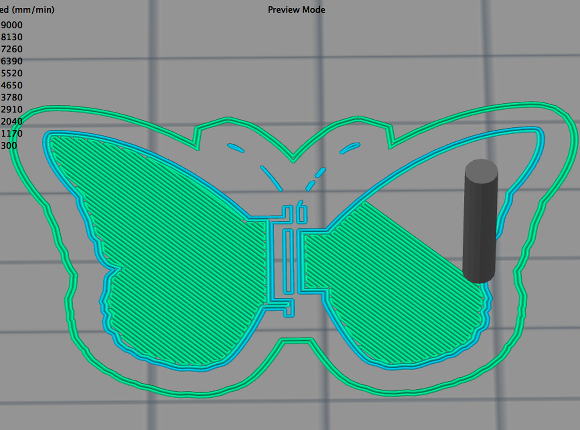
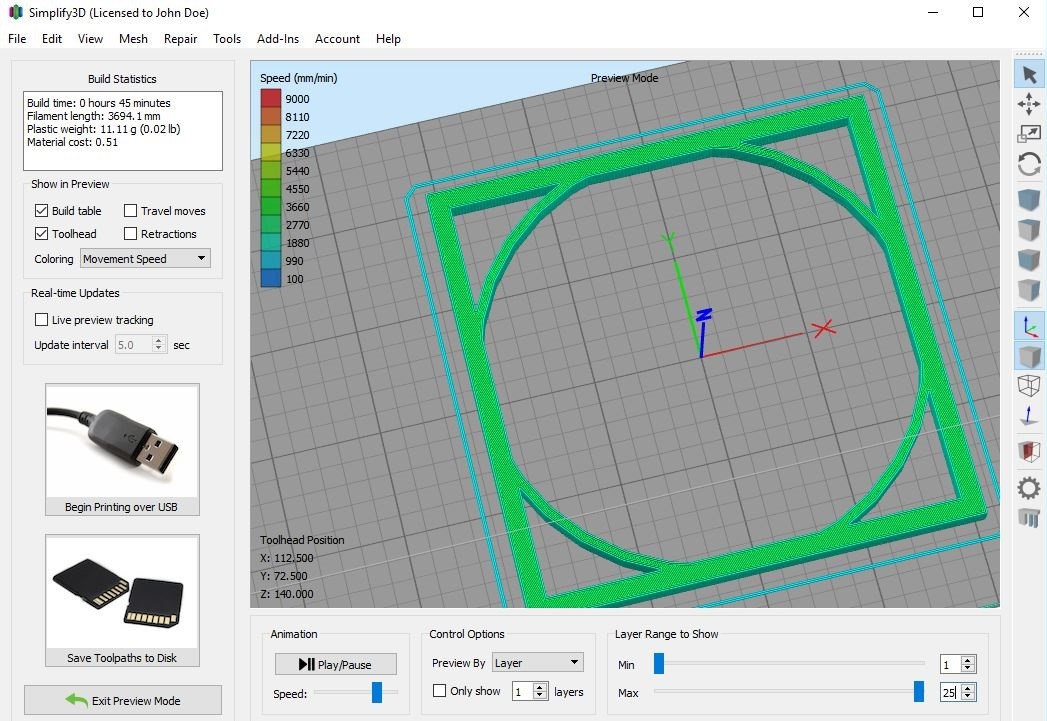 In Preview mode, you will see your completed part on the bed, with its skirt surrounding the part. Use the controls to watch the entire build sequence. The fastest animation is to leave the Start button stationary and drag the End button back and forth. Alternatively, click on Play/Pause to view the build in sequence, similar to the way you would control a video(play, pause, fast forward, rewind).
We advise that you always Preview the entire build sequence. You may see things in the Preview that you want to adjust. Improve your print process now, before you waste valuable print time and material!
After watching the Preview, choose from three options (bottom left):
- Print over USB
- Save toolpath to disc
- Exit Preview mode (if you want to make changes to your Processes).
Assuming you are ready to print, your printer will take some time to heat up before it starts printing. Extruders heat in a couple minutes, whereas heated beds may take 20 minutes. If you are using a USB connection, this is a great time to reopen the Machine Control Panel and monitor your temperatures and communication.
As your build process starts, watch carefully as the extruder begins laying down the skirt and your first layer and check for potential problems:
- If the filament is not laying down, your nozzle and bed are too close to each other. End the print and tighten your spring a little and run the print again to make sure that the filament is laying a smooth line.
- If the filament is sticking or curling around the extruder head rather than the bed, your bed is too far away from the nozzle. End the print and either loosen the bed a bit in each corner or lower your first layer percentage.
Once your bed is level and your first layer has laid down perfectly, you are on your way to a successful print. Congratulations! You can take what you have learned here and implement it for any part you wish to print.