
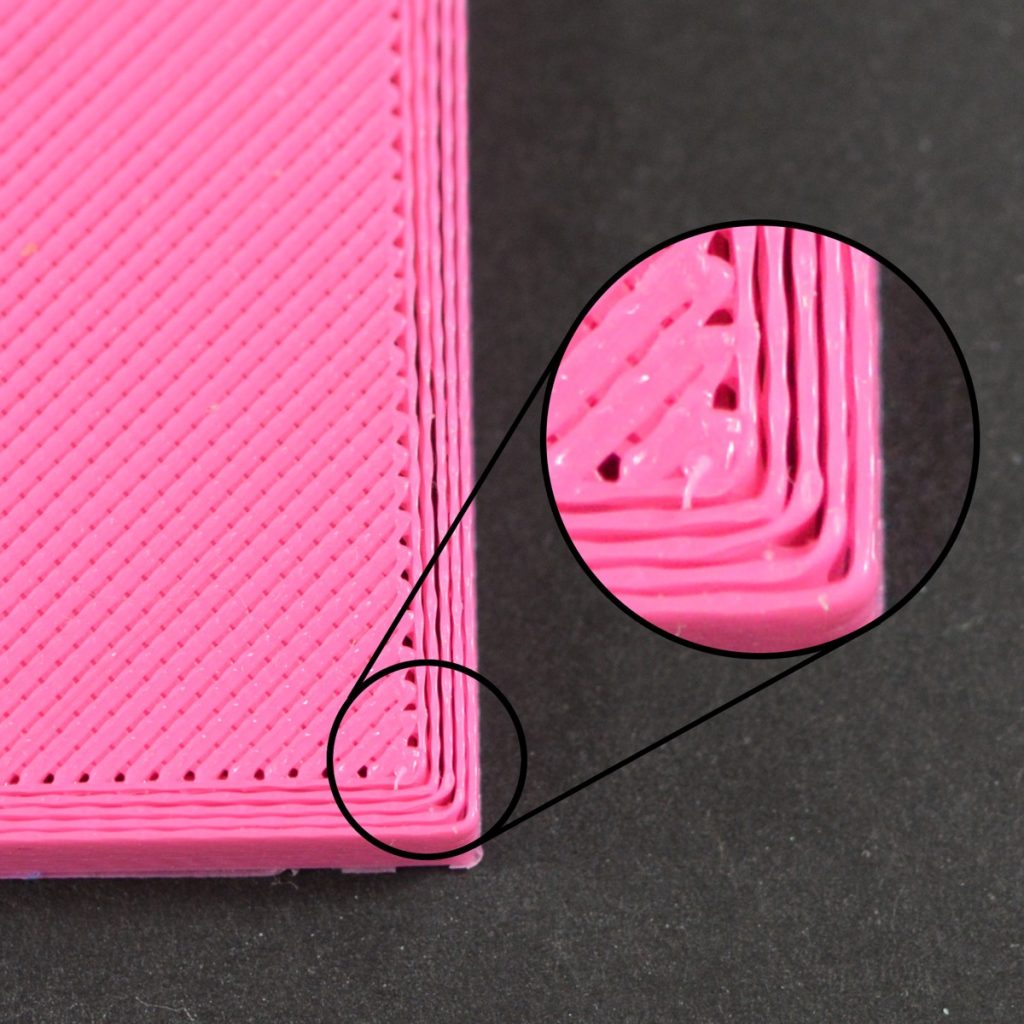
Gaps in Floor Corners
When building a 3D printed part, each layer relies on the foundation from the layer below. However, the amount of plastic that is used for the print is also a concern, so a balance must be achieved between the strength of the foundation and the amount of plastic that is used. If the foundation is not strong enough, you will start to see holes and gaps between the layers. This is typically most obvious in the corners, where the size of the part is changing (for example, if you were printing a 20mm cube on top of a 40mm cube). When you transition to the smaller size, you need to make sure that you have a sufficient foundation to support the sidewalls of the 20mm cube. There are several typical causes for these weak foundations. We will discuss each one below and present the settings that can be used in Simplify3D to improve the print.
Common Solutions
Not enough perimeters
Adding more outline perimeters to your part will greatly improve the strength of the foundation. Because the interior of your part is typically partially hollow, the thickness of the perimeter walls has a significant effect. To adjust this setting, click “Edit Process Settings” and click on the Layer tab. For example, if you were previously printing with two perimeters, try the same print with four perimeters to see if the gaps disappear.
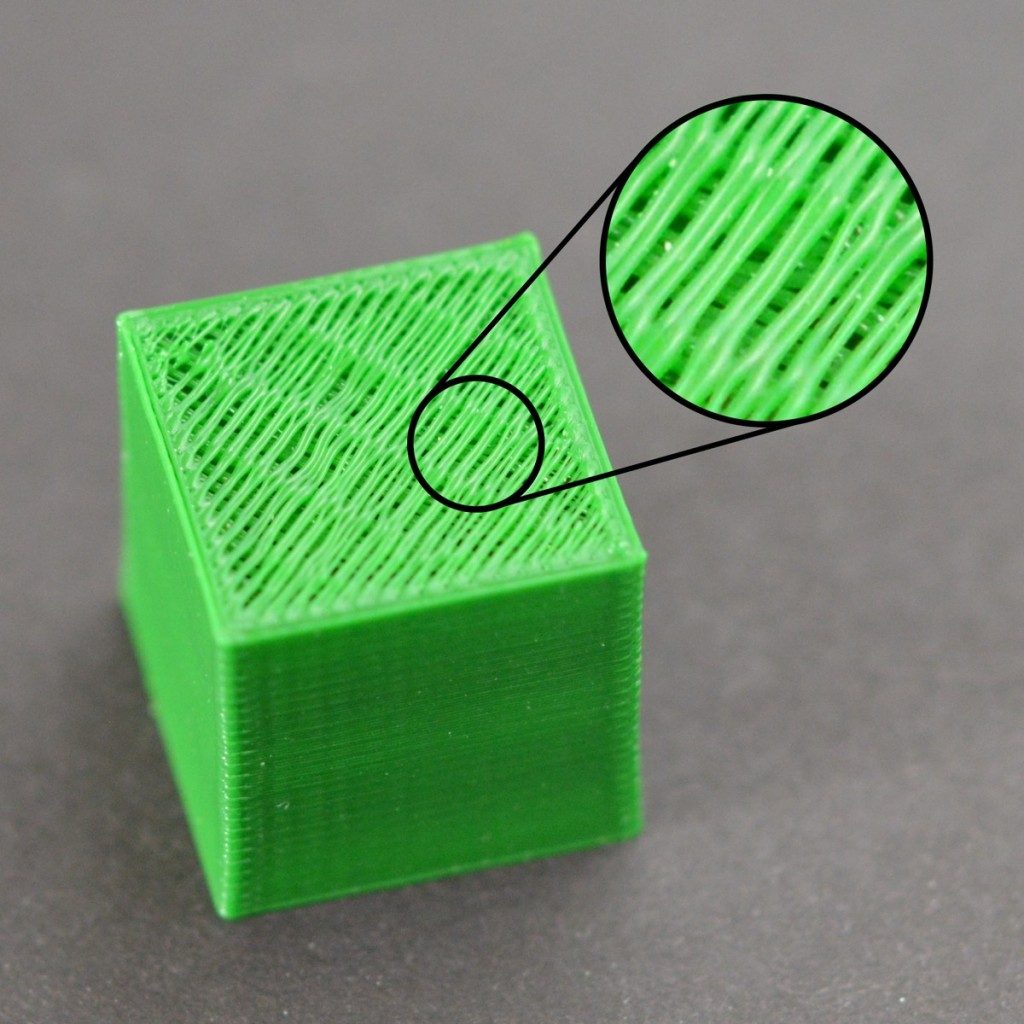
Not enough top solid layers
Another common cause for a weak foundation is not having enough solid layers for the top surfaces of your print. A thin ceiling will not be able to adequately support the structures that are printed on top of them. This setting can be adjusted by clicking “Edit Process Settings” and selecting the Layer tab. If you were previously using only two top solid layers, try the same print with four top solid layers to see if the foundation is improved.
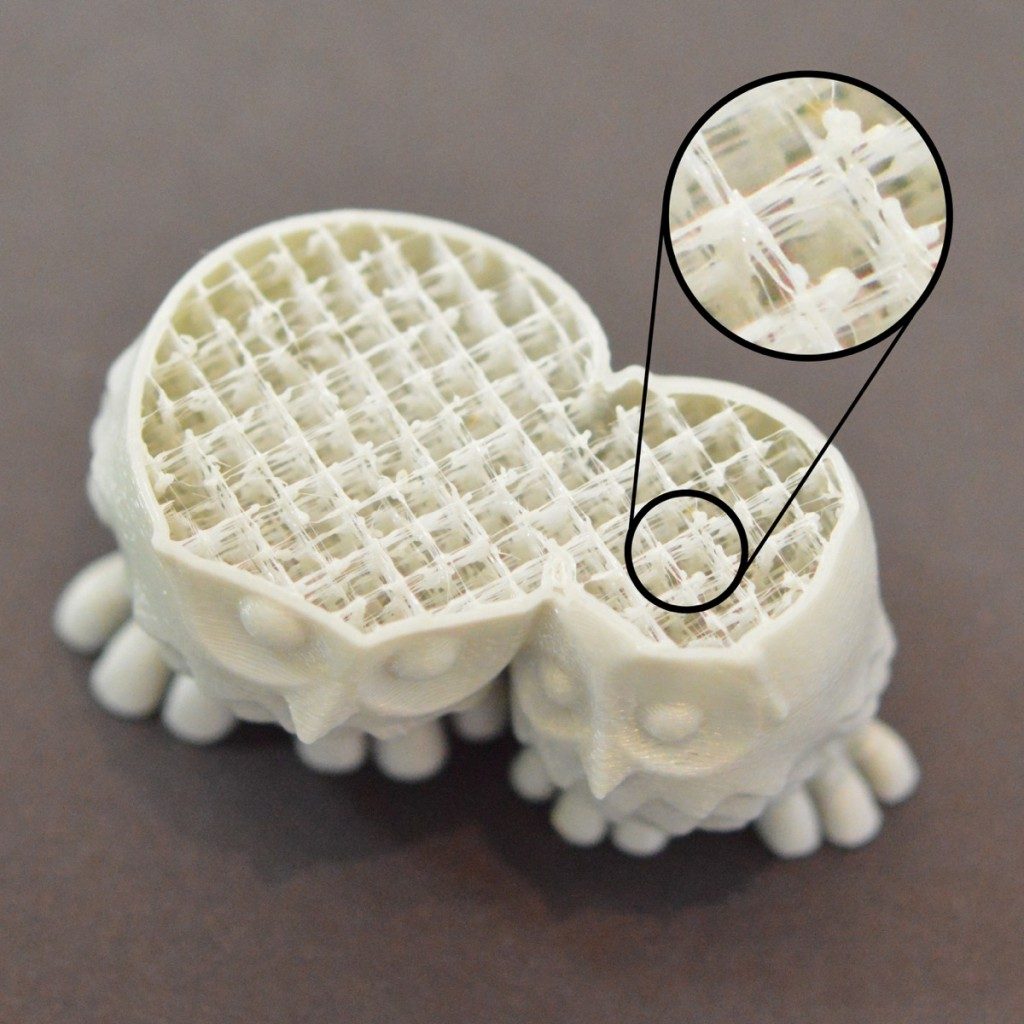
Infill percentage is too low
The final setting you should check is the infill percentage used for your print, illustrated by a slider under the Process Settings or found under the Infill tab. The top solid layers will be built on top of the infill, so it is important that there is enough infill to support these layers. For example, if you were previously using a infill percentage of 20%, try increasing that value to 40% to see if the print quality improves.
Related Topics
Under-Extrusion
Printer does not extrude enough plastic, gaps between perimeters and infill
Weak Infill
Very thin, stringy infill that creates a weak interior and does not bond together well
Gaps Between Infill and Outline
Gaps between the outline of the part and the outer solid infill layers