Simplify3D® and the IonCore Zinter® Pro
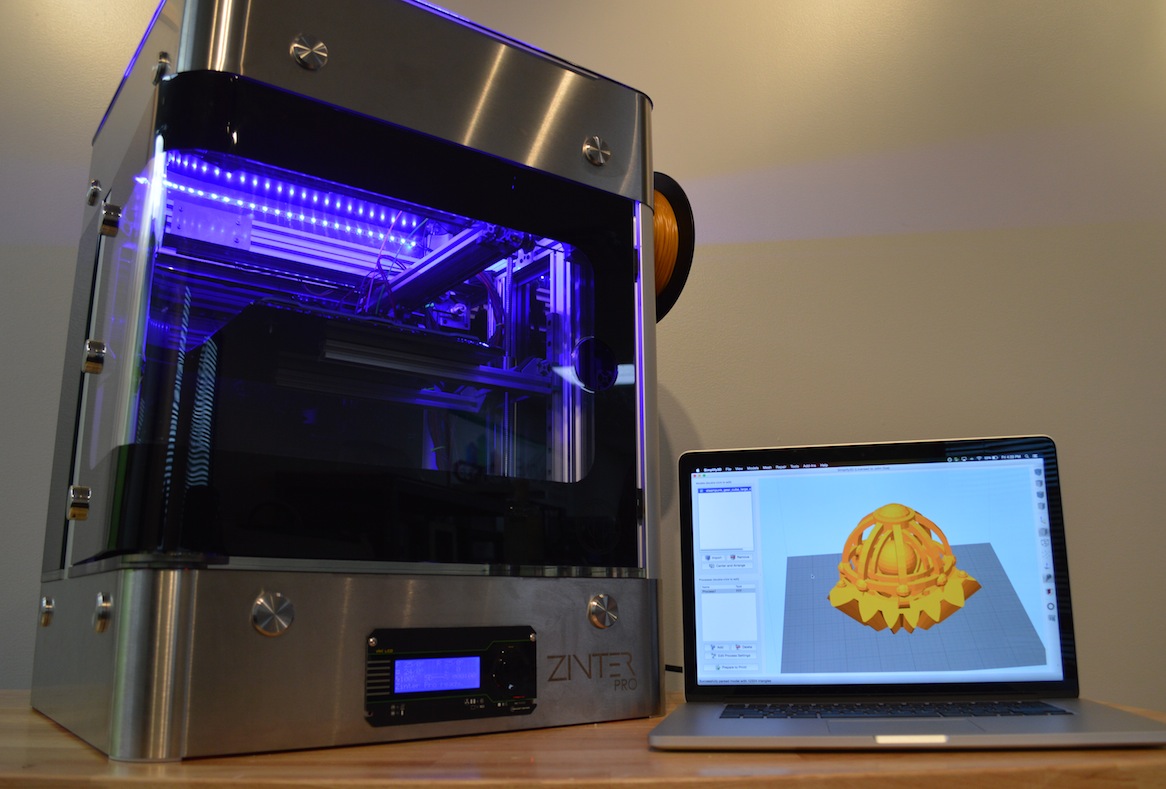 This setup guide will help set up an IonCore Zinter® Pro 3D printer with Simplify3D® All-In-One 3D printing software. The Zinter Pro printer has two extruders and a large build size of 200mm x 200mm x 200mm. The printer is manufactured by Ion Core Ltd, based out of the United Kingdom. This setup guide will walk through the process of unpacking a Zinter Pro machine and starting your first 3D print using Simplify3D.
Final Hardware Checks
Before starting your first print on the Zinter Pro, it is important to ensure that all of the packaging material is removed and that the extruder gantry is able to move freely in the X, Y and Z axes. After ensuring all packaging material is removed, it is time to load the filament. This can be done through the Machine Control Panel in Simplify3D (Tools > Machine Control Panel), or use the LCD menu on the printer itself to select Load Filament from the Utilities menu.
Printing with Simplify3D Software
When starting Simplify3D for the first time, you will be greeted with the Configuration Assistant. Select the IonCore Zinter Pro from this list and the software will be automatically configured for this machine. If this is not your first time using Simplify3D, you can still load the necessary settings by going to Help > Configuration Assistant.
After completing the Configuration Assistant, users are ready to import a 3D model. After importing the model, click “Edit Process Settings”. This will open the FFF Settings window where the slicing settings can be configured. More information is available about this window in the section below.
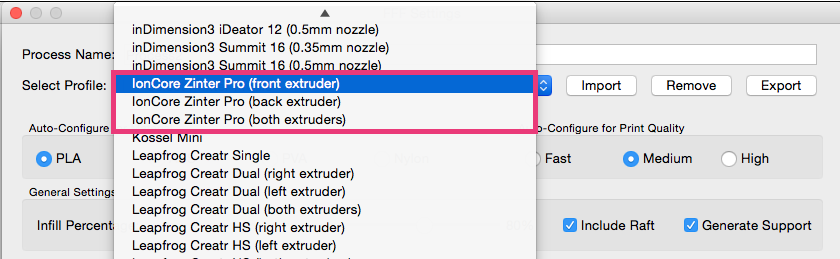
In the FFF Settings Window, there are 3 different profiles available for the Zinter Pro, depending on what type of printing you will be doing.
- IonCore Zinter Pro (front extruder) – Use this profile for prints involving the front extruder only
- IonCore Zinter Pro (back extruder) – Use this profile for prints involving the back extruder only
- IonCore Zinter Pro (both extruders) – Use this profile for any prints that will involve both extruders. For example, when performing dual extrusion or printing with soluble support material.
Simplify3D Process Settings for Zinter Pro
In this same window, there are options to select the material for the print, the preferred quality, infill percentage, and whether to use a raft or generate support material. To customize prints further, click the “Show Advanced” button. For more information on these advanced settings, please have a look at the Simplify3D Tutorial Library. For users wishing to perform dual extrusion, it is highly advisable to view our tutorial on Printing with Multiple Extruders.
After the Process Settings are configured, click “Prepare to Print!”. This will prompt the Simplify3D slicing engine to slice the file and create the necessary toolpaths for the Zinter Pro. Once complete, you can choose “Begin Printing over USB” to stream the files to the printer over USB, or select “Save Toolpaths to Disk” to export the .gcode file to your hard drive or SD card.
Connecting to the Zinter Pro via USB
If you have selected the Zinter Pro from the Configuration Assistant, then everything is already configured for the Zinter Pro and you should see a connection dialog after plugging in the machine to your computer. If the printer does not automatically connect, please open the Machine Control Panel by going to Tools > Machine Control Panel and verify the connection settings. The Baud Rate should be 250000 bps and it is also important to ensure the correct port is selected. After plugging in the printer, you may need to click the Refresh button for the new port to appear. On Windows, the correct port is usually the only one that starts with COM. Mac users should select the port that contains USB in the name.
Alternatively, you can also copy the .gcode files onto the Zinter’s SD card and then plug the card back into the printer to begin printing using the LCD menu.
Troubleshooting
Cannot connect over USB
If you are using Windows, please make sure that you have downloaded and installed the required USB drivers for the Zinter Pro. The easiest way to obtain these drivers is by downloading and installing the Arduino IDE. Please also ensure that no other program is currently connected to the Zinter, as only one program is allowed to connect at a time.