Simplify3D™ and the Ultimaker 2
 Final Hardware Checks
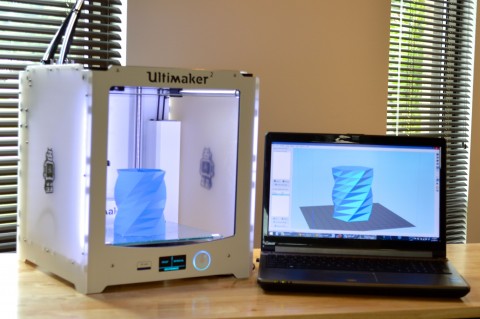
Before you start your first Ultimaker print using Simplify3D Software, here are a few steps to make sure that your Ultimaker 2 is ready for printing. The Ultimaker 2 User Manual can be found here and contains useful information for the unpacking and first-time use of your printer.
Confirm that all cardboard and packaging materials are removed from the inside of the printer and check to see that all the plastic ties stabilizing the XY axis and slider block are removed. Also, make sure that the glass plate is securely clamped onto the build platform and that the spool holder and filament guide are in place (the glass plate may arrive carefully packaged underneath the platform).
When you first turn on the Ultimaker 2, it will greet you with its First Run Wizard. This Wizard will guide you through leveling the bed and loading your filament and is explained in more detail in the Ultimaker 2 User Manual.
Software Setup
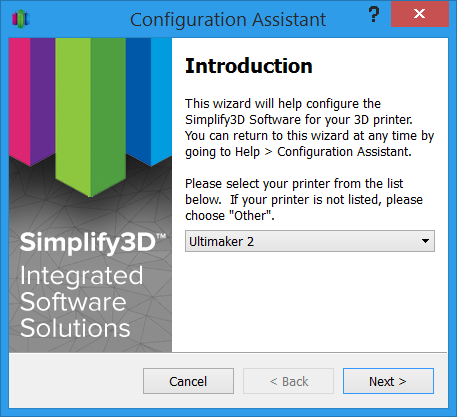 When you run Simplify3D for the first time, it will open the Configuration Assistant. Simply choose Ultimaker 2 from the drop down list and click ‘Next’ (the Configuration Assistant can be accessed at any time by going to Help > Configuration Assistant). Your software is now fully configured and we can advance to our workflow!
Importing and Configuring your Print
Drag-and-drop your STL file onto the software interface (or click Import to bring your model into the software).
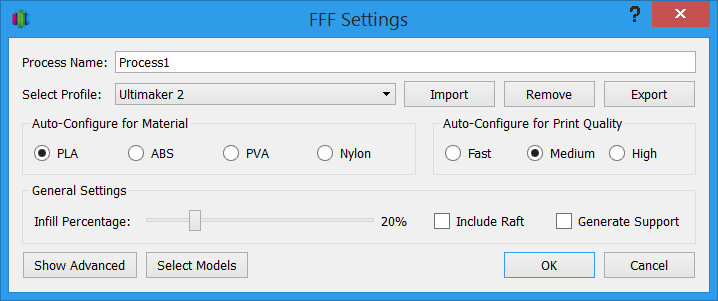 The Configuration Assistant automatically adds a pre-configured process in the Process List, saving you the time of the initial process configuration. You can modify the Process by clicking on the process name (Process1) or by clicking on Edit Process Setting. Either action will open the FFF settings window. This is where you will edit all your FFF settings, which directly influence the quality of the print. You should see that the ‘Ultimaker 2’ print profile is already selected for you under the ‘Select Profile’ drop-down menu. Note – if you need to reset to the pre-configured FFF settings you can always select another profile and then reselect ‘Ultimaker 2’.
Starting your Print
Now that we have configured the print settings for our model, it is time to print! Simply click Prepare to Print and the software will slice the model into gcode and the window will switch to the Preview mode. In the Preview, you can examine your print in detail, either line by line or layer by layer. We suggest using the Preview extensively so you fully understand the movements of your printer. It is a great way to examine your model for unexpected holes or deformities before you start your printer.
When you are satisfied with your preview, you can print your model in two ways. The first option is to print over the SD card. Insert the SD card into your computer, and click Save Toolpath to Disc. After your gcode has been saved to your SD card, remove the card and insert it into the SD card reader located on the front of the Ultimaker 2. Use the Ultimaker circular selector to select ‘Print’; then choose the correct model. The Ultimaker 2 will have a message asking whether you would like to override machine settings, select “CONTINUE” and the print will begin.
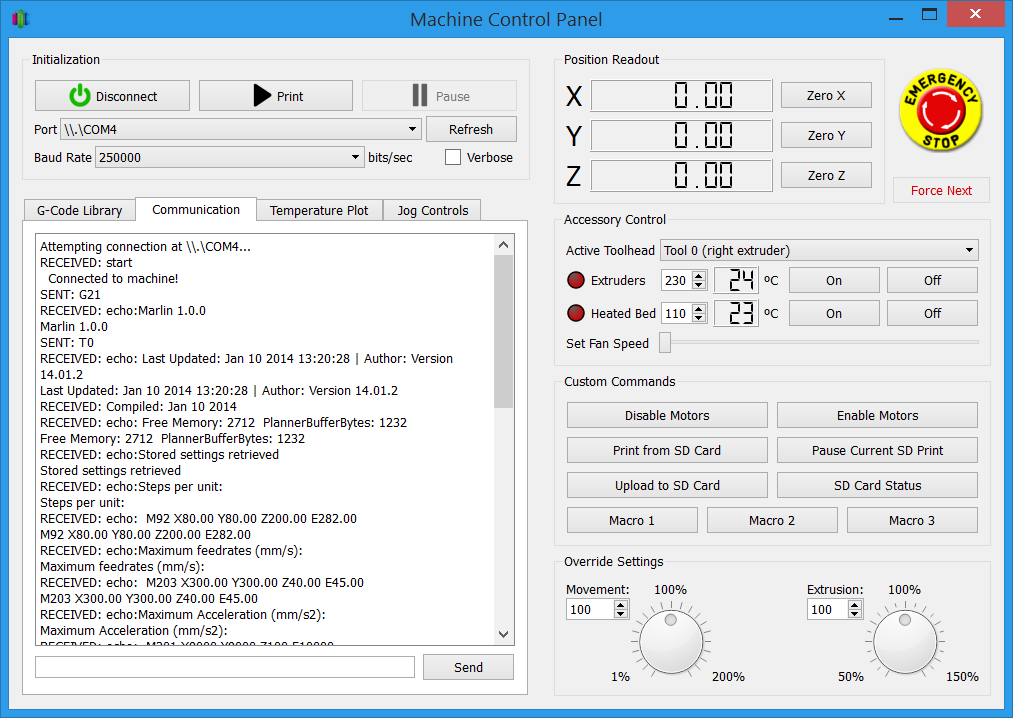 The second option is to print over the USB cable. For the Ultimaker 2, this involves a few more steps than the SD card method. First, open the Machine Control Panel. You can do this by going to Tools > Machine Control Panel or by clicking on the Gear Icon in the quick launch bar. Next, select the 250000 bits/sec option under the ‘Baud Rate’ drop-down menu. Connect your computer to the printer with the USB cable. The Ultimaker 2 will flash its lights and the LCD screen will refresh with a ‘printing over USB’ sentence. This is normal and signifies that you have connected successfully. Verify this by selecting the ‘Communication’ tab in the software. There should be no unreadable symbols. Once you have successfully connected, simply go back to the Preview and click on ‘Begin Printing over USB’. The printer will begin to heat!
Congratulations! You’ve reached the end of the guide and you are now ready to start making models using Simplify3D Software with your Ultimaker 2! If you have further questions, browse through our tutorials to learn important printing techniques.
Troubleshooting
- If you wish to manually configure your firmware settings you can open the ‘Firmware Configuration’ by going to Tools > Firmware Configuration.
- During the USB connection process, you may need to click the red ‘Connect’ button after plugging in your USB cable if the auto-connect fails.