Simplify3D® and the Dremel® Idea Builder
 This page is designed to help you set up your Dremel® 3D Idea Builder for use with the Simplify3D® All-in-One software*. The Idea Builder is an extremely well-built printer that was designed for PLA extrusion. The large build volume, easy-to-remove build surface, and the quality enclosure make this an enticing 3D printer at an MSRP of $999.
*Note: Simplify3D is not affiliated with Dremel or Bosch Tools in any way
Final Hardware Checks
Prior to using the 3D Idea Builder with Simplify3D Software, it’s very important to ensure that your machine is ready for printing. Please make sure that any cardboard, packaging materials, and zip ties are removed from the inside of the printer. Verify that the roll of filament is properly mounted on the spool and is being routed through the plastic guide tube. Using the touch-screen on the printer, you can select the Load Filament option which will heat the extruder and push the filament into the nozzle.
The Bed Leveling option on the touch-screen is also extremely helpful in setting up the printer. Use the three knobs on the bottom of the printer and adjust the height at each position in the bed leveling process to ensure your build platform is ready for printing.
The Dremel 3D printer has 4GB of internal storage via a micro SD card connected to the electronics control board, as well as an externally removable SD card accessible from the right side of the machine. When printing over USB, the files will be transferred onto the internal storage. You also have the option of copying files onto the external SD card if you wish to print using the LCD screen. This guide will explain how to print using both of these methods.
Printing with Simplify3D
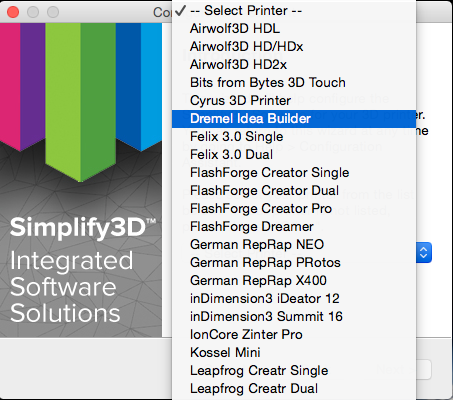 The first time a user starts Simplify3D they are greeted with a Configuration Assistant that includes a list of supported printers. Select the “Dremel Idea Builder” from this list to automatically configure the software for your machine. If this is not your first time opening the software, but you’d like to open the Configuration Assistant, please select Help > Configuration Assistant to bring up this window.
After completing the Configuration Assistant, import the 3D model you’d like to print. To Import a model, you can either select the Import button or drag-and-drop the file into the graphics window. After importing the model, please click “Edit Process Settings”. This will open the FFF Settings window where you can configure a wide variety of slicing options.
In the process settings, you will also find options to select the material for the print, the preferred quality, infill percentage, and whether to use a raft or generate support material. If you’d like to customize your prints further, please click the “Show Advanced” button. For more information on the settings available in the Advanced Settings view, please view our other tutorials, which are available in the Tutorial Library.
After the Process Settings are configured, please click “Prepare to Print!”. This will convert the 3D models on your build plate into the necessary toolpaths for the Dremel printer. Once this process is complete, you will then have the option to “Begin Printing over USB” or to “Save Toolpaths to Disk”. If printing to USB, please turn on the printer and connect the printer’s USB cable to your computer. If the USB connection does not automatically occur, please open the Machine Control Panel by going to Tools > Machine Control Panel to verify your connection settings. If printing from an SD card, you can simply click “Save Toolpaths to Disk” to export the toolpaths as .g3drem file. The Dremel printer uses this unique .g3drem file format so you can then copy this file onto the Dremel’s external SD card and begin printing using the built-in LCD screen.
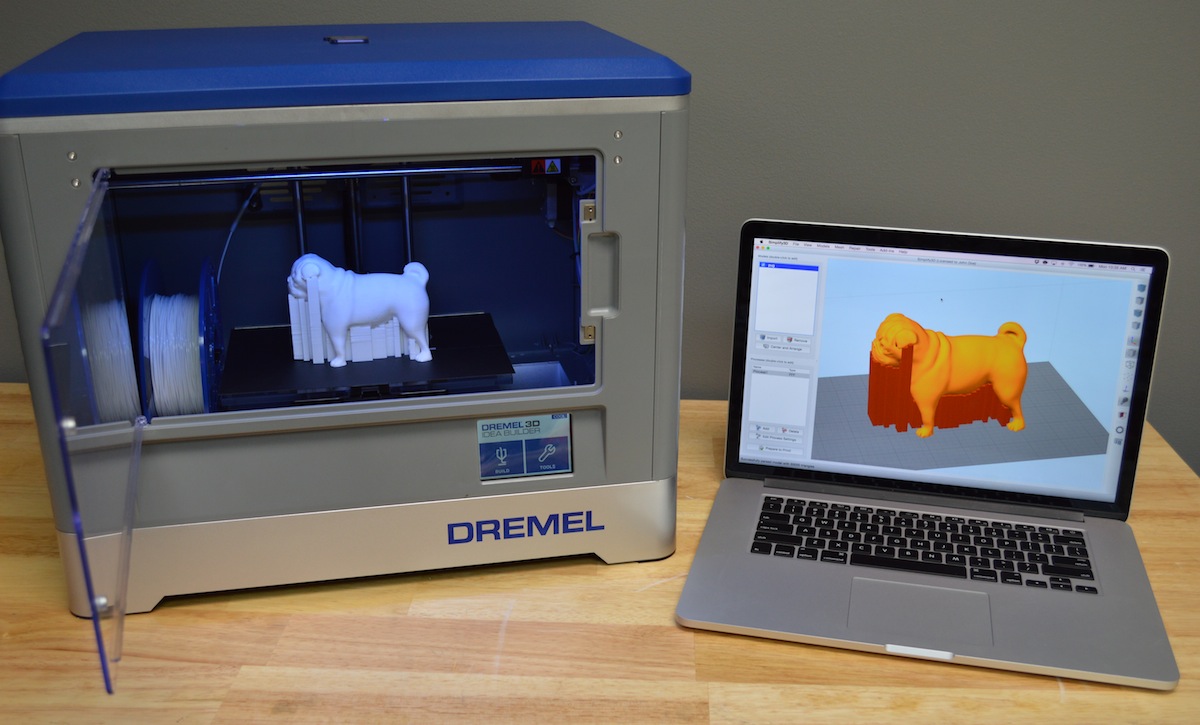
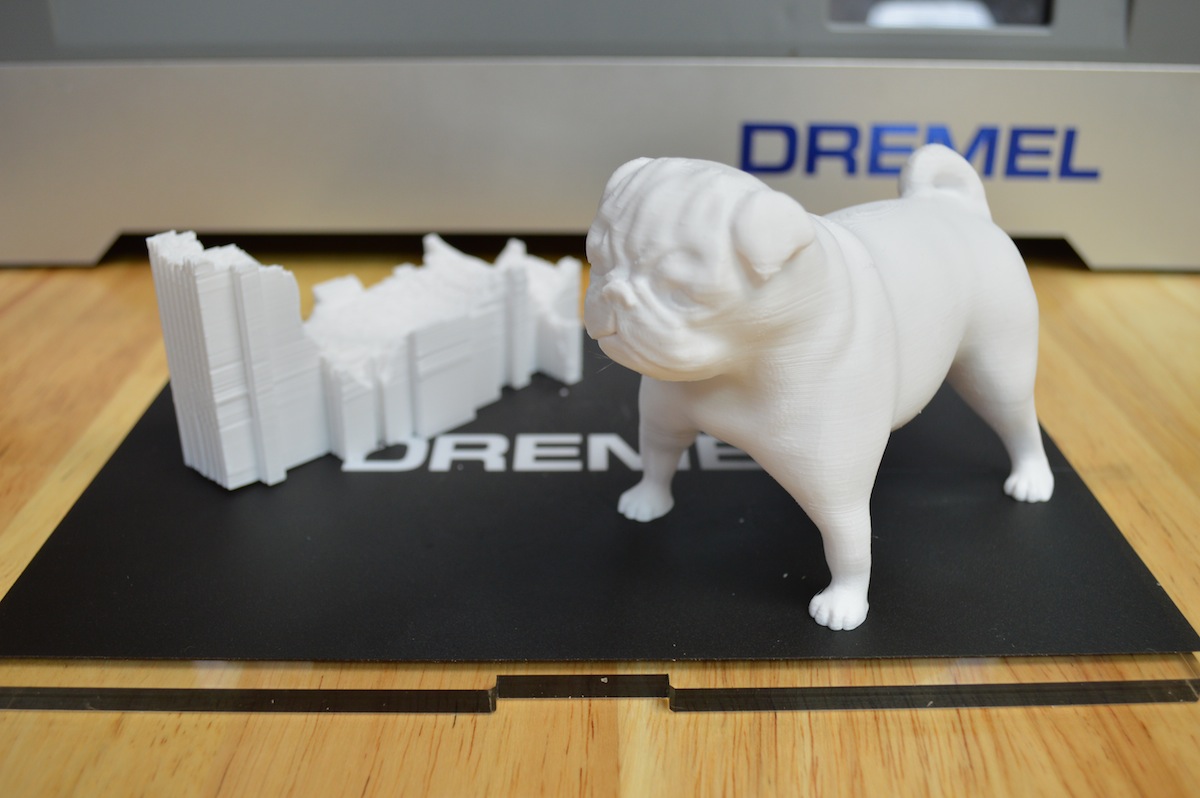 At this point, you are free to use all of Simplify3D’s advanced features with the Dremel Idea Builder 3D printer. This allows Dremel users to unlock many new capabilities on their machines such as printing parts with support material or using the advanced slicing and previewing engines embedded in the Simplify3D Software. The model to the left would not have been printable without support material. The software will automatically place support where you need it and it breaks away extremely easily after the print is complete. In fact, many times the entire web of support material separates in a single piece, as was the case with this print. The Dremel Idea Builder is a high-quality machine, and now the software gives you the ability to use this machine to its full potential.
Troubleshooting
Simplify3D won’t connect to my printer
It’s very important that the Dremel Idea Builder drivers are installed on your computer. The easiest way to install these drivers is by installing the Dremel 3D Idea Builder software from Dremel. If you are unable to connect with Simplify3D, please install the Dremel software, and then attempt to connect to the printer using that software. If this is successful, it ensures your drivers are properly installed. You can then close Dremel software and attempt the connection a second time using Simplify3D. Note that you may need to power cycle the Dremel between connection attempts.
I recently upgraded my software and I do not see the profiles for the Dremel Idea Builder
Please go to Help > Reset All Settings, then reopen the software. This will restore all of the stock profiles, including those for the Dremel 3D Idea Builder.